Table of Contents
- Why Winter Mice Infestations Happen
- How to Find Mouse Entry Points in Your Foundation
- Best Materials to Seal Mouse Holes
- Step-by-Step Sealing Process
- Moisture Control and Preventative Maintenance
- DIY vs. Professional Rodent Exclusion
- Conclusion
- Frequently Asked Questions
Why Winter Mice Infestations Happen
Mice don’t hibernate, they invade. When outdoor temperatures drop, rodents actively seek warm shelter inside homes and buildings. A single entry point the size of a dime is enough for a mouse to squeeze through (the CDC). Winter creates urgency because mice reproduce rapidly indoors, and a small problem in November becomes a serious infestation by February.
Most homeowners wait until they see droppings or hear scratching before taking action. By then, mice have already established nesting sites in walls, attics, and crawl spaces. Prevention through rodent exclusion is far more effective than dealing with an active infestation.
At Zoifia Pest Control, we’ve helped homeowners in the Metro Boston area seal their homes against winter mice. This guide covers identifying entry points, choosing the right materials, executing a complete perimeter inspection, and deciding whether DIY exclusion makes sense for your situation.
How to Find Mouse Entry Points in Your Foundation
Finding entry points requires a systematic perimeter inspection. Mice typically enter through gaps in the foundation, cracks in exterior walls, spaces around utility lines, and openings in siding. Start at ground level and work upward, looking for any opening larger than a quarter-inch.
Common foundation entry points include:
- Gaps between the foundation and sill plate
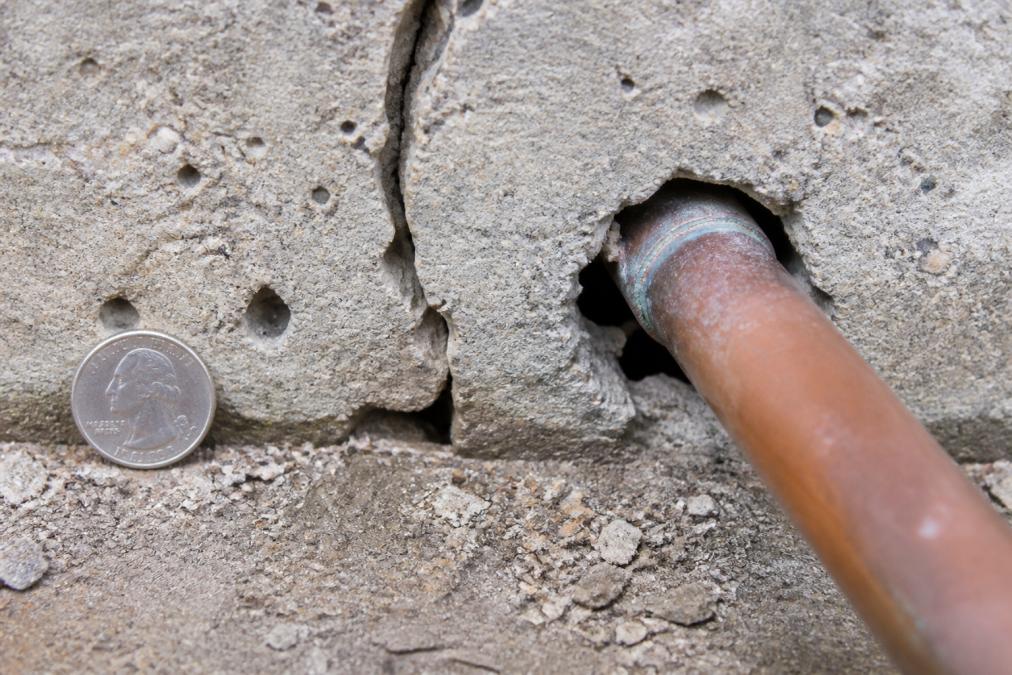
- Cracks in concrete or mortar, especially around corners
- Spaces where pipes and utility lines penetrate the foundation
- Gaps in the rim joist area
Common Entry Points to Inspect
Foundation cracks are the most common entry points. Even hairline cracks can expand in freeze-thaw cycles, creating passageways for rodents. Inspect the entire perimeter, paying special attention to corners where stress cracks develop.
Utility line penetrations are another frequent entry route. Water lines, gas lines, electrical conduits, and drain pipes all create openings. Mice will gnaw through old caulk or expanding foam around these penetrations if the seal is compromised.
Ridge vents and attic access points are vulnerable from above. Mice can climb exterior walls and enter through damaged vents or gaps around attic hatches. Weep holes in brick siding serve a drainage purpose but are also direct entry points for rodents, typically spaced every 32 inches along the foundation line.
Crawl space vents present similar challenges. These vents are necessary for moisture control, but the gap between the vent frame and duct opening is a common entry point.
Signs of Mice in Walls During Winter
Fresh droppings are the clearest sign of active infestation, they’re small, dark, and roughly the size of a grain of rice, typically clustered in corners or along wall edges.
Listen for scratching or gnawing sounds, especially at night when mice are most active. Gnawing sounds are rhythmic and deliberate as mice work to enlarge openings or access food.
Nesting materials indicate mice have established themselves indoors. Mice shred paper, insulation, and fabric to build nests. Oily staining around entry points signals repeated rodent traffic along the same routes.
Best Materials to Seal Mouse Holes
Not all sealing materials are equally effective. Mice can gnaw through standard caulk, and they’ll work around loose foam. The best approach combines multiple materials strategically based on gap size and location.
Hardware Cloth and Steel Wool
Hardware cloth is a metal mesh screen with 1/4-inch or smaller openings (the FDA). Mice cannot gnaw through it, making it one of the most effective rodent exclusion materials. Steel wool is equally effective, mice dislike the texture and cannot easily gnaw through the metal fibers. Steel wool works best for gaps smaller than 1/2-inch because it compresses to fill irregular spaces.
Both materials require additional sealant to hold them in place. Steel wool alone will fall out over time without securing, and hardware cloth needs fastening with screws or staples, then sealing around edges with caulk or foam.
Caulk and Expanding Foam
Silicone-based caulk is effective for sealing small cracks and gaps up to 1/4-inch wide. It remains flexible as the house settles and expands or contracts with temperature changes.
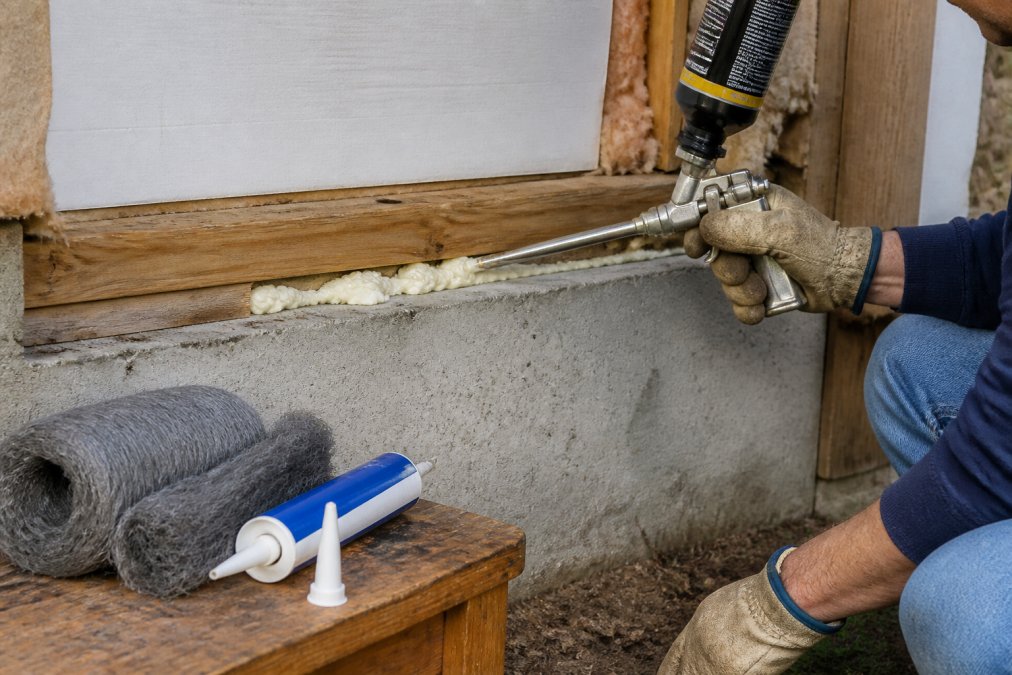
Expanding foam fills larger gaps and hardens into a solid barrier, expanding to fill irregular spaces completely. However, mice can gnaw through cured foam if unprotected with a harder material.
The most effective approach combines foam with hardware cloth or steel wool: apply foam first, then cover the cured foam with hardware cloth or steel wool, and seal edges with caulk.
Copper Mesh for Rodent Exclusion
Copper mesh combines the benefits of hardware cloth with a material mice actively avoid. Copper’s antimicrobial properties make rodents less likely to gnaw through it. Though more expensive than steel wool or standard hardware cloth, its effectiveness and durability justify the cost for critical entry points. Copper mesh works particularly well around foundation penetrations and utility line entries.
Step-by-Step Sealing Process
A complete sealing process typically takes 4-8 hours depending on entry point number and size.
Step 1: Conduct a Complete Perimeter Inspection
Walk the entire perimeter of your home, including foundation, siding, and roof line. Mark every gap, crack, and opening with chalk or tape. Pay particular attention to transitions where different materials meet, as these often have gaps that expand and contract seasonally.
Document the size of each opening. Gaps smaller than 1/4-inch can be sealed with caulk alone (the CDC). Gaps between 1/4-inch and 1/2-inch need steel wool plus caulk. Openings larger than 1/2-inch require hardware cloth or copper mesh plus foam and caulk.
Step 2: Seal Foundation Cracks and Gaps
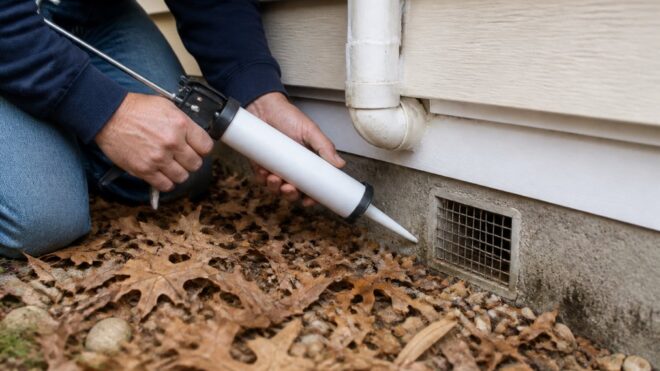
Start with the foundation, the most common entry route. Clean out debris, old caulk, or loose material from cracks using a wire brush or compressed air.
For hairline cracks, apply silicone caulk directly into the crack using a caulking gun. For wider cracks (1/4-inch to 1/2-inch), fill with steel wool first, packing it firmly, then apply caulk over it. For cracks larger than 1/2-inch, use expanding foam to fill the gap, let it cure fully (usually 24 hours), trim excess with a utility knife, then cover with hardware cloth or copper mesh and seal edges with caulk.
Step 3: Protect Utility Line Penetrations
Water lines, gas lines, electrical conduits, and drain pipes all create entry points. Inspect each penetration for gaps between the pipe and surrounding material.
For small gaps (less than 1/4-inch), remove old caulk and apply fresh silicone caulk around the pipe. For larger gaps, wrap copper mesh or hardware cloth around the pipe, overlapping the surrounding surface by at least 2 inches, secure with screws or staples, then seal edges with caulk. Pay special attention to the underside of pipes passing through the rim joist or sill plate.
Step 4: Address Ridge Vents and Attic Access
Inspect ridge vents for tears, separation from the roof line, or gaps where the vent meets shingles. Small tears can be sealed with roofing cement and a patch. Larger damage requires replacing the entire vent section.
Attic access hatches often have gaps around the frame. Install a sweep (rubber or vinyl strip) on the underside of the hatch to seal the gap when closed.
Step 5: Manage Weep Holes and Crawl Space Vents
Installing a weep hole cover (rodent guard) is the most effective solution for weep holes in brick siding. These covers allow water drainage while blocking rodent entry and can be installed from the exterior.
Crawl space vents require similar treatment. Vent covers made of 1/4-inch hardware cloth can be installed over existing vents, sealed completely around edges. If your home has a crawl space with exposed soil, a vapor barrier (plastic sheeting) over the soil reduces moisture and makes the space less attractive to pests.
Moisture Control and Preventative Maintenance
Moisture accumulation in crawl spaces, basements, and attics attracts rodents and the insects they feed on. Ensure gutters and downspouts direct water away from the foundation, downspouts should extend at least 4-6 feet from the house.
Ventilation prevents moisture buildup in attics and crawl spaces. Ensure attic vents are clear and unobstructed. A dehumidifier in the basement or crawl space can help if ventilation alone is insufficient. Maintaining indoor humidity below 50% makes the space less attractive to rodents.
Inspect your sealing work annually, especially before winter. Freeze-thaw cycles can crack caulk or loosen hardware cloth. Reapply caulk or tighten fasteners as needed.
DIY vs. Professional Rodent Exclusion
DIY sealing is effective for homes with a small number of entry points and no active infestation. Materials are inexpensive, and the work is straightforward for someone comfortable with basic tools and ladder work.
Professional rodent exclusion has significant advantages. Trained technicians identify entry points homeowners miss, especially in difficult-to-access areas. Professionals have experience with structural issues that may need attention beyond simple sealing.
Professional exclusion typically includes a warranty. If rodents return within the warranty period, the work is redone at no charge. Zoifia Pest Control provides a detailed quote after a complete inspection and offers a 90-day guarantee, if mice return after sealing, we address it without additional charges.
For renters or those in older buildings with numerous structural gaps, professional exclusion is often the most practical solution. Older homes in the Metro Boston area frequently have foundation issues, settling cracks, and deteriorated siding that create multiple entry points.
Conclusion
Sealing your home against winter mice requires identifying entry points, choosing the right materials, and executing a systematic sealing process. The most common mistakes are missing entry points during inspection, using inadequate materials that mice can gnaw through, and failing to address moisture issues that attract rodents.
If you’re dealing with an active infestation or your home has structural vulnerabilities that make DIY sealing impractical, Zoifia Pest Control can help. We conduct a complete perimeter inspection, identify all entry points, and seal them using professional-grade materials and techniques. Our licensed team provides a 90-day guarantee, so you have peace of mind knowing the work is backed by our commitment to your pest-free home. Get a quote today and take the first step toward keeping winter mice out.
Frequently Asked Questions
Q: How do I know if mice are already in my walls during winter?
A: Look for droppings near baseboards, kitchen cabinets, or storage areas. Listen for scratching sounds in walls, especially at night. Check for gnawing marks on food packaging, wiring, or structural materials. A musty odor and nesting materials (shredded paper, fabric) are also clear signs. If you spot any of these indicators, rodent exclusion and sealing should be paired with professional removal to eliminate existing populations.
Q: What’s the best material for sealing mouse holes permanently?
A: Copper mesh combined with silicone caulk offers a durable solution. Mice cannot gnaw through copper, and the caulk helps prevent gaps from reopening. For larger gaps (over 1/4 inch), use hardware cloth backed with expanding foam, then seal with caulk. Steel wool works as a temporary filler but should be combined with caulk for lasting results. Avoid relying on expanding foam alone, mice can chew through it if not sealed properly.
Q: How often should I inspect my home for new mouse entry points?
A: Conduct a thorough perimeter inspection twice yearly: once in fall before winter arrives and again in spring. Check foundation cracks, utility line penetrations, ridge vents, weep holes, and attic access points. After sealing, inspect monthly during winter months for any new gaps caused by settling or weather damage. Seasonal maintenance checklists help catch deterioration early and prevent reinfestation before cold weather drives mice indoors.
Q: Can I seal my home against mice myself, or do I need a professional?
A: Small gaps and obvious entry points can be sealed with basic materials and patience. However, professional rodent exclusion can help identify hidden entry points you might miss, ensure proper material application, and address structural issues like foundation cracks that require specialized equipment. If you already have mice inside, professional removal is essential, sealing alone traps them indoors. For comprehensive protection, many homeowners combine DIY sealing with professional inspection to identify missed vulnerabilities.
This article was written using GrandRanker
