Table of Contents
- How to Find Ant Entry Points
- Will Caulk Stop Ants from Entering
- Best Caulk for Sealing Cracks and Gaps
- Should You Use Ant Bait Before Sealing Entry Points
- Step-by-Step: How to Seal Cracks to Stop Ants
- Common Mistakes to Avoid When Sealing Cracks
- Preventing Ants from Returning After Sealing
- Frequently Asked Questions
Last Updated: October 10, 2026
How to Find Ant Entry Points
Ants follow trails from outside searching for food and water. Finding where they enter is the critical first step to sealing cracks to stop ants effectively.
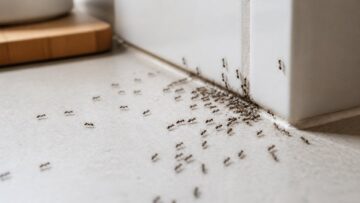
Observe ant activity and watch where they move, along baseboards, window frames, or other surfaces. The path usually leads back to their entry point.
Follow visible ant trails backward toward doors, windows, or foundation areas. Ants leave scent markers that guide other ants along walls, under cabinets, or near food sources.
Inspect common entry points carefully:
- Window frames and sills
- Door frames and thresholds
- Cracks in walls and foundations
- Gaps around pipes and utilities
- Spaces where trim meets walls
- Corners where walls meet floors
Use a flashlight to check dark corners and crevices. Ants squeeze through openings as small as 1/16 inch, so inspect hairline cracks both inside and outside your home.
Mark entry points with tape or a marker as you find them. This prevents you from missing spots when you start sealing. Take photos too, they help you remember exact locations when you’re ready to apply sealant.
Will Caulk Stop Ants from Entering
Yes, caulk stops ants from entering when applied correctly by blocking the pathways they use. However, caulk alone isn’t enough if ants are already inside or scent trails remain active.
Caulk physically blocks openings, ants cannot chew through properly applied silicone or acrylic latex, which hardens into a solid barrier.
Caulk must fill the entire crack depth and width to create a true seal that blocks the physical opening and disrupts the scent trail ants use to navigate.
Caulk is most effective as a prevention tool. If ants are actively returning, disrupt their scent trails first by cleaning, then seal entry points to prevent new routes.
Caulk seals cracks but doesn’t kill ants. If you seal entry points while ants are still active inside, they may find alternative routes or become trapped, creating a bigger problem. Address active ant activity before or while sealing cracks.
Best Caulk for Sealing Cracks and Gaps
Choosing the right sealant for crack location, size, and material prevents wasted effort and premature failure.
Silicone caulk is the strongest choice for most ant entry points. It resists moisture, remains flexible, doesn’t shrink, and bonds well to wood, metal, glass, and masonry.
Acrylic latex caulk is easier to apply and paint over for interior, dry locations. Use for interior wall cracks, trim gaps, and drywall repairs. Cure time: 1-3 hours.
Expanding foam sealant fills large gaps wider than 1/2 inch around doors, windows, pipes, and utilities. Trim excess after curing (4-8 hours).
Masonry filler bonds to concrete, brick, or stone foundations where standard caulk fails. Use for foundation cracks, gaps in brick/stone, and failed mortar joints.
How to choose: Identify crack location and material (interior/exterior, damp/dry, wood/drywall/masonry/metal).
For most ant entry points around foundations, basements, and exterior walls, 100% silicone caulk is the safest choice. It handles moisture, temperature changes, and movement without failing. Interior, dry cracks can use acrylic latex to save cost.
Should You Use Ant Bait Before Sealing Entry Points
Using ant bait before sealing is smart if ants are actively foraging inside, as it eliminates them before you trap any inside by sealing.
Ant bait poisons the colony as worker ants carry it back to the nest, spreading through the population in 3-7 days.
Sequence: place bait along trails, wait 5-7 days, disrupt scent trails with cleaning, then seal cracks. If you seal before baiting, you trap ants inside. For dozens of ants daily, use bait first. For occasional ants, sealing alone may suffice.
The goal is to eliminate the colony before sealing entry points. This prevents trapped ants from creating new problems inside your home.
Step-by-Step: How to Seal Cracks to Stop Ants
Sealing cracks to stop ants requires careful preparation, correct material selection, and verification that the seal has held. Follow these steps to create a lasting barrier that ants cannot breach.
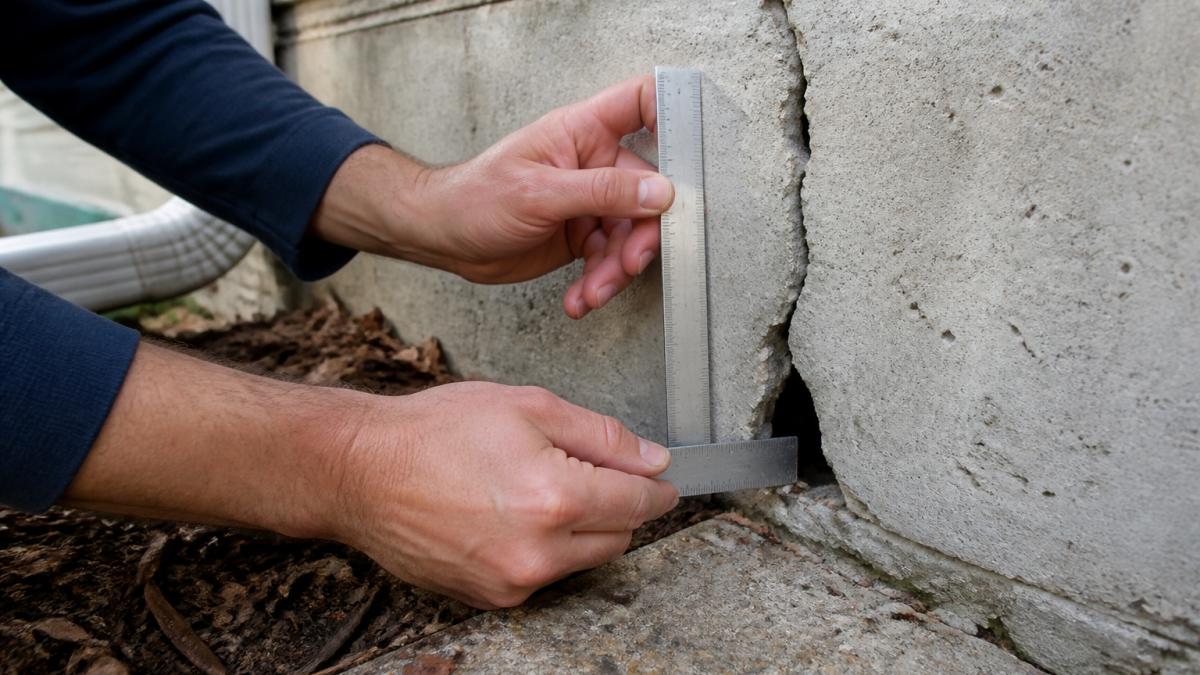
Step 1: Locate and Measure Entry Points
Identify every crack or gap using a flashlight. Measure width and depth to determine sealant type: hairline-1/8 inch (caulk alone), 1/8-1/4 inch (caulk or backer rod), 1/4-1/2 inch (backer rod plus caulk), over 1/2 inch (expanding foam). Note location and material to choose silicone, acrylic latex, masonry filler, or foam.
Step 2: Disrupt Scent Trails and Clean the Area
Ants leave chemical scent markers guiding others back. Mix equal parts white vinegar and water, spray along trails and entry points, let sit 5-10 minutes, and wipe clean. Repeat for stubborn trails. Allow area to dry completely (2-3 hours minimum) before caulking, as moisture prevents bonding.
Step 3: Prepare the Crack
Remove loose debris with a putty knife or scraper. For deep cracks, use a vacuum crevice tool or compressed air. For cracks deeper than 1/2 inch, insert backer rod (foam rope) about 1/4 inch below the surface to prevent caulk from sinking. Dry thoroughly, moisture prevents adhesion.
Step 4: Apply Sealant
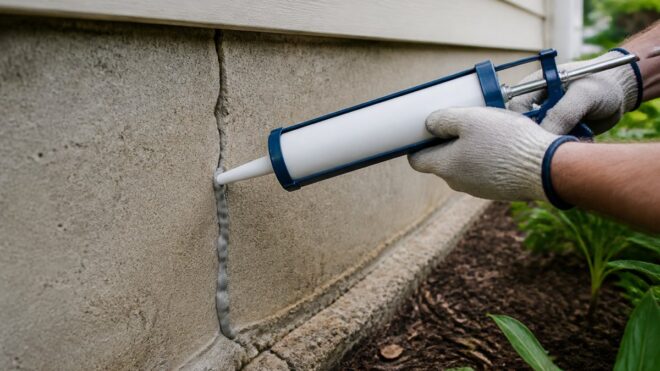
For caulk: Cut tube tip at 45 degrees to match crack width (1/8-1/4 inch). Apply steady, even pressure along the crack, filling completely. Smooth immediately with a wet finger or tool, creating a concave finish.
For expanding foam:
Shake the can for 1-2 minutes. Hold it upright. Apply short bursts into the gap, filling it about 50% full. The foam expands as it cures.
Allow the foam to cure fully (typically 4-8 hours). Once cured, trim excess foam with a utility knife. Sand the surface smooth if needed. Caulk over the foam if desired for a finished appearance.
For masonry filler:
Mix the filler according to label directions. Use a putty knife to pack it firmly into the crack. Overfill slightly and smooth level with the surface. Allow to cure per label directions (typically 24 hours).
Step 5: Allow Proper Curing
Do not disturb the sealant during curing. Check the product label for cure time. Most silicone caulks cure in 24-48 hours. Acrylic latex cures faster, typically 1-3 hours. Expanding foam cures in 4-8 hours.
During curing, keep the area dry. Do not expose it to water, moisture, or high humidity. Do not paint over the sealant until it is fully cured. Premature disturbance causes the seal to fail.
After curing is complete, inspect the seal. It should be hard, not tacky. Press gently with your finger, it should not indent. If it feels soft or sticky, allow more time to cure.
Step 6: Install Weatherstripping Around Doors and Windows
Weatherstripping blocks gaps that caulk alone cannot reach, especially around moving parts like doors and windows.
Measure the gap width around the door or window frame. Choose weatherstripping type accordingly:
- Foam tape: Best for gaps up to 1/4 inch
- Rubber or silicone strips: Better for gaps 1/4 to 1/2 inch
- Door sweeps: For gaps at the bottom of doors
Clean the frame surface thoroughly with a dry cloth. Remove dust, dirt, and old weatherstripping. Peel the backing from the new weatherstripping and press it firmly into place. Start at one corner and work your way around, pressing as you go to ensure good contact.
Test the door or window to ensure it still closes smoothly. Weatherstripping should not bind or prevent operation.
Step 7: Monitor and Verify the Seal
After 48 hours, inspect all sealed cracks. Look for gaps, cracks, or separation in the sealant. Run your finger along the seal, it should be smooth and continuous with no soft spots.
If you notice ants returning to a sealed area within 1-2 weeks, the seal may have failed. Inspect it closely. Common failure modes include:
- Shrinkage: Acrylic latex caulk shrinks as it dries, leaving a gap. Reapply silicone caulk over the gap.
- Separation: The sealant pulled away from the crack edge. This usually means the surface was not clean or dry. Remove the failed sealant, clean and dry the crack again, and reapply.
- Cracking: The sealant developed cracks or splits. This indicates movement or poor adhesion. Scrape out the failed sealant and reapply with a more flexible product (silicone instead of acrylic latex).
If ants are still active inside your home after sealing, they may have found an alternative entry point. Repeat the inspection process to locate other cracks or gaps you may have missed.
Do not seal cracks while ants are actively foraging inside your home. Trapping ants forces them to find new routes or become trapped, creating a bigger problem. Use ant bait first to eliminate the colony, then seal entry points. See “Should You Use Ant Bait Before Sealing Entry Points” for timing guidance.
Common Mistakes to Avoid When Sealing Cracks
Many homeowners make preventable errors when sealing cracks to stop ants. Avoiding these mistakes saves time and improves results.
Sealing while ants are still active. Trapping ants inside forces them to find new routes.
Applying caulk to wet surfaces. Moisture prevents proper bonding. The sealant won’t stick and may fail within weeks.
Underfilling cracks. A thin layer of caulk leaves gaps. Ants can find their way through incomplete seals.
Using the wrong caulk type. Acrylic latex fails in damp areas. Silicone works better for most ant entry points, especially basements and foundations.
Skipping scent trail disruption. Ants follow chemical markers even if the physical opening is sealed.
Ignoring small cracks. Ants squeeze through openings as small as 1/16 inch. Don’t skip hairline cracks just because they seem minor.
Improper caulk application is the most common reason sealing fails. Take time to fill cracks completely and allow proper curing time. Rushing leads to gaps that ants exploit.
Preventing Ants from Returning After Sealing
Sealing cracks is the foundation of ant prevention, but additional steps keep them from returning.
Maintain a clean home. Remove food debris promptly. Wipe down counters and sweep floors regularly.
Store food in airtight containers. Sealed storage prevents ants from detecting food odors that draw them inside.
Fix water leaks immediately. Ants need water as much as food. Damp areas attract them. Check under sinks and around pipes for leaks.
Trim vegetation near your home. Tree branches and bushes touching your exterior provide highways for ants to reach entry points.
Inspect sealed areas regularly. Check caulked cracks and weatherstripping every few months. Caulk can shrink or crack over time.
Consider professional help if problems persist. Zoifia Pest Control offers comprehensive ant elimination and prevention services backed by a 90-day guarantee.
Frequently Asked Questions
Will caulk stop ants from coming back?
Caulk seals entry points and prevents ants from accessing your home, but only if applied correctly to all cracks and gaps. Silicone-based caulk is more durable than acrylic latex, lasting several years before needing reapplication. However, sealing alone won’t eliminate an active infestation already inside your home, you must address the ants present first, then seal to prevent return.
How do you find where ants are getting into your home?
Follow ant trails to their source. Look for visible scent trails leading to cracks, gaps, or openings around windowsills, door frames, foundation walls, and partition walls. Check entry points where pipes or utilities enter the home. Inspect the exterior foundation for crevices and openings. If trails are hard to spot, place a small food source near suspected entry points and watch where ants congregate, then trace backward to the opening.
Should you seal an ant entry point before treating the ants?
No. If ants are actively entering, apply ant bait first to eliminate the colony, then seal entry points. Sealing too early traps ants inside, forcing them to find new routes and potentially causing them to spread deeper into walls or other areas. Wait until ant activity has stopped for several days before sealing cracks and gaps.
What’s the best caulk for sealing cracks where ants enter?
Silicone-based caulk is the best choice for durability and flexibility, lasting 5-10 years without cracking. Acrylic latex caulk is cheaper but degrades faster, typically lasting 2-3 years. For areas that experience temperature changes or movement, silicone resists shrinking and maintains its seal better. Choose based on the location: silicone for exterior cracks and gaps, acrylic latex for interior walls if budget is a concern.
Sealing cracks to stop ants is one of the most effective prevention strategies available. It requires preparation, the right materials, and attention to detail, but the results protect your home for months. If ant problems return despite your sealing efforts, professional pest control becomes the next logical step. Zoifia Pest Control provides fast, reliable solutions with no long-term contracts, just effective results and peace of mind.