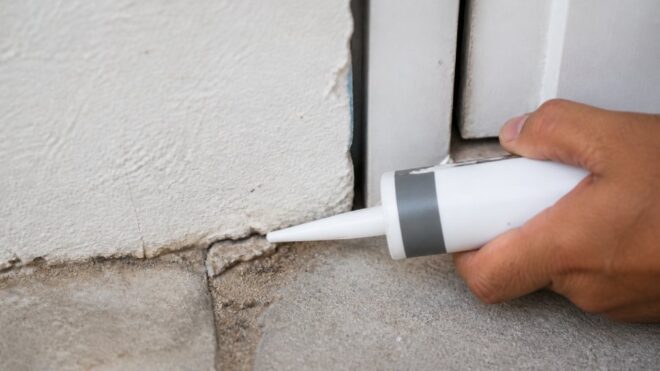
Table of Contents
- Why Sealing Cracks Alone Won’t Solve Your Ant Problem
- How to Find Ant Entry Points in Your Home
- Best Caulk for Ant Prevention and Sealing Materials
- Step-by-Step: How to Seal Cracks to Prevent Ants
- Weatherstripping and Door Sweeps for Perimeter Defense
- Disrupting Ant Scent Trails During Sealing
- When to Call Professional Pest Control
- Conclusion
Last Updated: August 26, 2026
Why Sealing Cracks Alone Won’t Solve Your Ant Problem
Sealing cracks is critical for pest control, but it’s only half the battle. Many homeowners caulk every visible crack and gap, only to find ants returning within weeks. The reason is straightforward: ants follow chemical trails laid by scout ants, and those trails persist even after you’ve sealed the entry point.
Here’s what most guides miss: ants already inside your home remain there. Sealing stops NEW ants from entering but does nothing about the established colony in your walls, foundation, or nearby structures. At Zoifia Pest Control, we’ve found that the most effective approach combines sealing with targeted colony elimination. Without addressing the source, you’re slowing an infestation, not stopping it.
This is where the "Trap-Before-Seal" strategy comes in. Before caulking a single crack, you must eliminate active foraging ants and disrupt their scent trails. Only then does sealing become truly effective. Timing matters: seal too early and you trap ants inside while the colony thrives; seal at the right moment and you cut off their supply lines permanently.
Sealing cracks without eliminating the colony first often backfires. Trapped ants may chew through drywall or partition walls to find new routes, creating damage that costs more to repair than the original infestation.
How to Find Ant Entry Points in Your Home
Visual Identification of Ant Entry Points
Finding ant entry points requires patience and systematic observation. Follow a foraging ant backward to see where it came from. Most entry points are obvious once you know where to look: foundation cracks, gaps around window frames, spaces where utility lines penetrate exterior walls, and areas where the foundation meets the sill plate.
Look for these specific locations first:
- Foundation cracks: Run your flashlight along the entire foundation perimeter. Even hairline cracks are passable for ants.
- Windowsills and door frames: Check caulking around windows and door sweeps where wood has shrunk or old caulk has deteriorated.
- Utility penetrations: Where electrical conduit, water lines, gas lines, or HVAC ducts enter the building, gaps often remain as highway entry points.
- Expansion joints: In concrete slabs or between siding sections, expansion joints provide direct pathways.
- Interior wall voids: Once inside, ants travel through partition walls and along baseboards.
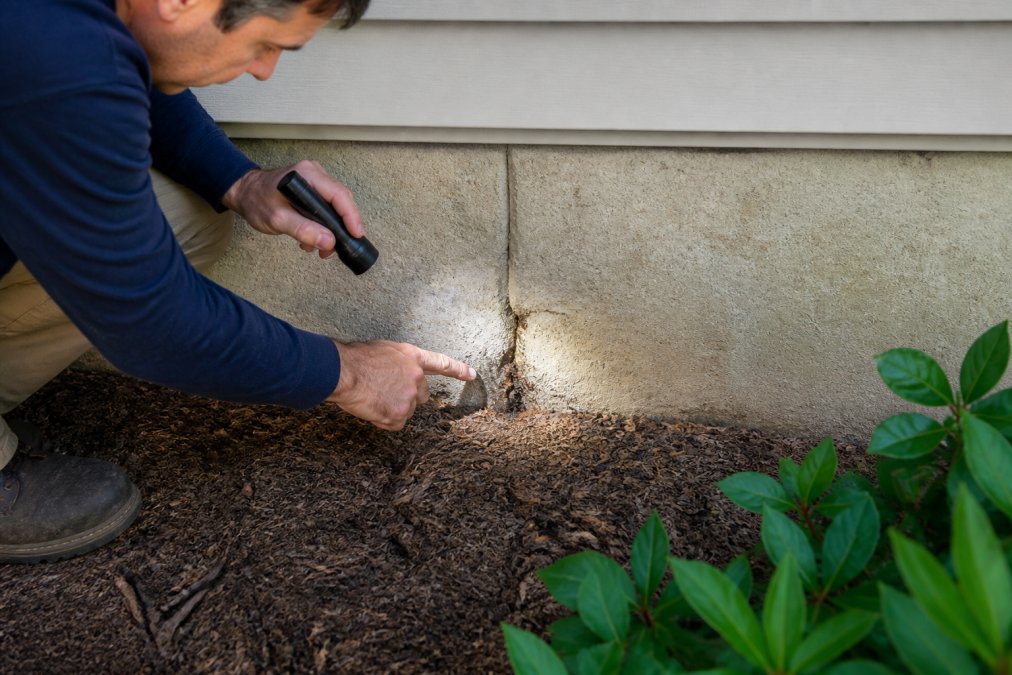
Mark each entry point with tape or chalk. A single infestation may involve multiple entry points, and you must address all of them to prevent reinfestation.
The Trap-Before-Seal Strategy
The Trap-Before-Seal Strategy is the operational difference between a temporary fix and a permanent solution.
Step one: Deploy baiting stations near active entry points. Liquid or granular baits work well because foraging ants carry them back to the colony. This takes 3 to 7 days but is critical, you’re poisoning the source, not just the visible ants (peer-reviewed research).
Step two: Monitor the baits. As ant activity decreases, you’ll see fewer ants on the trails, signaling the colony is weakening.
Step three: Only after ant activity drops significantly should you begin sealing. Sealing before colony elimination creates a pressure cooker where trapped ants find new routes through interior walls or by chewing drywall.
Rushing this process is a common mistake. Many homeowners seal immediately and wonder why ants return two weeks later. The colony is still active; it’s simply found a new way inside.
Use [liquid ant baits](/pet-safe-ant-repellent-for-kitchens/) near entry points for 5-7 days before sealing. Liquid baits are more effective than dry baits because ants transport them directly to the nest, ensuring colony-wide elimination.
Best Caulk for Ant Prevention and Sealing Materials
Material Compatibility Guide
Not all caulks are created equal for ant prevention. Your choice affects how long the seal lasts and its resistance to ant damage.
Silicone-based caulk is the gold standard for exterior cracks and foundation sealing. It remains flexible as temperatures change, resists UV degradation, and is extremely difficult for ants to chew through. Silicone maintains integrity for 10 to 20 years (astm.org). The downside: it’s harder to paint and more expensive.
Acrylic latex caulk is cheaper and paintable, making it popular for interior work. However, it’s softer than silicone and more prone to deterioration. Ants can chew through it over time, especially if it cracks. Use acrylic latex for interior partition walls and drywall cracks, but avoid it for exterior foundation sealing.
Polyurethane caulk offers a middle ground. It’s more flexible than acrylic latex, more resistant to chewing, and paintable. It works well for gaps around utility penetrations and door frames.
Match the material to the location:
| Location | Recommended Material | Why |
|---|---|---|
| Foundation cracks | Silicone-based caulk | Durability, UV resistance, chew-resistant |
| Utility line gaps | Polyurethane or silicone | Flexibility around penetrations |
| Interior drywall cracks | Acrylic latex caulk | Paintable, cost-effective |
| Window and door frames | Silicone or polyurethane | Weather resistance and durability |
| Expansion joints | Polyurethane or silicone | Must flex with structural movement |
Silicone-based caulk is the most ant-resistant sealing material for exterior cracks. It lasts longer, resists chewing, and maintains flexibility through temperature swings.
Step-by-Step: How to Seal Cracks to Prevent Ants
Preparing the Crack
Before applying any caulk, the crack must be clean and dry. Dirt, old caulk, and moisture prevent proper sealing.
Remove old caulk using a caulk removal tool or utility knife. A heat gun softens stubborn caulk for easier removal. Clean the crack thoroughly with a wire brush to remove loose concrete, paint chips, and debris. Use a shop vacuum for deep cracks, then wipe with a damp cloth and let dry completely. Wait at least 2 to 4 hours before applying caulk.
For cracks wider than 1/2 inch, use backer rod first. This foam cord fills the bulk of the gap, reducing caulk needed and improving the seal. Insert it to about 1/4 inch below the surface, leaving room for caulk on top.
Applying Caulk Effectively
Application technique determines whether your seal lasts or fails. A poorly applied bead will crack and shrink, defeating the purpose.
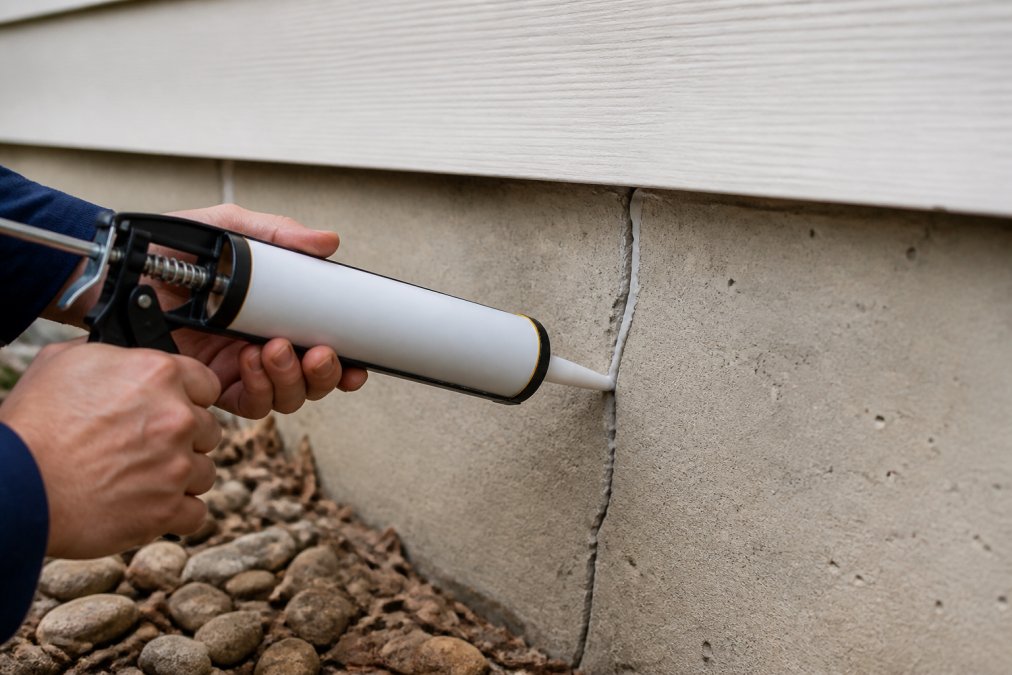
Load the caulking gun and cut the tip at a 45-degree angle, making the opening slightly smaller than the crack width. Hold the gun at a 45-degree angle and apply steady, even pressure, moving slowly along the crack. The caulk should slightly overfill, creating a convex bead.
Immediately smooth the bead with a wet finger or caulk tool, pressing the caulk into the crack and removing excess. This takes 30 seconds per linear foot but is essential for adhesion and durability.
Let the caulk cure fully before exposing it to moisture or traffic. Most silicone caulks cure in 24 to 48 hours. Check manufacturer instructions for your specific product.
Sealing Gaps Around Utility Lines
Utility penetrations are often overlooked yet are prime entry points. Where electrical conduit, water lines, gas lines, or HVAC ducts pass through exterior walls or foundations, gaps remain around the penetration.
Inspect these areas with a flashlight. If you can see daylight around a utility line, ants can find their way in. For small gaps (less than 1/4 inch), use silicone-based caulk. For larger gaps, use expandable foam sealant first, then seal over it with silicone caulk once cured.
Pay special attention to areas where multiple lines cluster, these are often the messiest penetrations and most likely entry points.
Weatherstripping and Door Sweeps for Perimeter Defense
Doors and windows are constant pressure points for ant entry. Even small gaps allow ants to pass through. Weatherstripping and door sweeps are your first line of defense.
Door sweeps are most important. A door sweep covers the gap between the bottom of the door and the threshold. Install one on every exterior door, choosing an adjustable model to match your specific door. Sweeps cost $10 to $30 and take 10 minutes to install.
Weatherstripping around door frames and windows prevents ants from entering around the sides. Adhesive-backed foam weatherstripping is easiest to install: clean the frame, peel the backing, and press firmly into place. Replace weatherstripping every 2 to 3 years as it deteriorates (energy.gov).
For sliding glass doors and windows, apply weatherstripping to the top and sides. A door sweep designed for sliding doors works well for the bottom.
Install door sweeps and weatherstripping in spring before ant season peaks. This gives you time to identify gaps and make adjustments before foraging ants are most active.
Disrupting Ant Scent Trails During Sealing
Ants navigate using pheromone trails, chemical markers laid by scout ants. These trails persist even after you’ve sealed the entry point, causing ants to search for alternate routes. Disrupting these trails is crucial.
When you seal a crack, you block the route physically, but the pheromone trail remains on the exterior surface. Clean the area around the sealed crack with a solution of water and dish soap or a commercial ant trail cleaner. This removes pheromone markers and makes it harder for ants to find their way back.
Apply the cleaning solution extending about 12 inches in all directions from the sealed crack. Repeat this cleaning 2 to 3 times over the first week after sealing. The pheromone trails weaken as ants stop using them, and multiple cleanings accelerate the process.
For interior cracks, clean baseboards and sealed areas with soapy water to remove trails and prevent ants from using interior pathways.
When to Call Professional Pest Control
Some infestations are beyond DIY sealing. Knowing when to call a professional saves time, money, and frustration.
Call a professional if:
- The infestation is widespread: Multiple rooms or entry points indicate a large, established colony requiring professional assessment and stronger treatments.
- Sealing hasn’t worked after two weeks: Persistent ants despite sealed entry points suggest the colony is nesting inside your home or in an inaccessible location.
- The infestation returns repeatedly: Recurring infestations suggest the colony is nearby or entry points aren’t fully sealed.
- You’re uncomfortable with DIY treatment: Pest control requires precision, timing, and knowledge of ant behavior.
- You have a rental property or commercial space: Landlords and property managers often need recurring maintenance. Zoifia Pest Control offers flexible service without long-term contracts.
Zoifia Pest Control specializes in eliminating ants and other household pests in the Metro Boston area. Our licensed and insured team combines sealing recommendations with targeted colony elimination, backed by a 90-day guarantee. We work with homeowners, landlords, and renters without long-term contracts.
Sealing cracks to prevent ants is a practical, cost-effective step that works best when combined with colony elimination. The effort you invest now, identifying entry points, choosing the right materials, and applying caulk correctly, pays dividends in months of ant-free living. If the infestation is severe or your sealing efforts haven’t resolved the problem, professional pest control ensures the job is done right. Zoifia Pest Control’s licensed team can assess your situation, recommend sealing improvements, and eliminate the colony, giving you the peace of mind that comes with a 90-day guarantee.
Frequently Asked Questions
Will ants chew through caulk or sealant?
Ants cannot chew through properly applied silicone-based caulk or acrylic latex caulk. However, low-quality or improperly sealed cracks may crack over time due to temperature changes or settling, creating new entry points. High-quality silicone sealants resist degradation and maintain their barrier properties for several years. Inspect sealed areas annually and reseal any cracks that form.
What's the best caulk for ant prevention?
Silicone-based caulk is the most durable option for ant prevention because it resists cracking and lasts 10-20 years. Acrylic latex caulk is easier to apply and clean up but may need resealing every 5-10 years. For areas exposed to moisture or temperature extremes, choose 100% silicone. For interior walls and drywall, acrylic latex works well. Always verify the product label states it's suitable for your specific surface material.
Should I seal cracks where ants are already entering?
No. If you see active foraging ants using a crack, seal it only after you've eliminated the colony. Sealing while ants are actively using the entry point traps them inside and forces them to find new routes deeper into your walls. First, use baiting to eliminate the colony, wait a few days to confirm activity stops, then seal the crack. This prevents reinfestation and avoids pushing the problem further into your structure.
When should I call a professional pest control service instead of sealing cracks myself?
Call a professional if you see ants inside your home regularly, suspect an active infestation in wall voids, or have tried sealing and baiting without success. A professional can identify hidden entry points, confirm whether a colony exists inside your structure, and apply targeted treatments. For recurring infestations in older buildings or complex structural layouts, professional pest exclusion combined with colony elimination is more reliable than DIY sealing alone.
This article was written using GrandRanker
