Table of Contents
- Safety Precautions and Protective Gear for Spider Nest Removal
- Spider Egg Sac Identification: What You Are Looking At
- Tools and Techniques for Removing Spider Nests Safely
- How to Dispose of Spider Egg Sacs and Nest Debris
- Natural Spider Repellent for Home and Preventative Measures
- When to Call Professional Pest Control for Spider Infestations
- Frequently Asked Questions
Last Updated: September 11, 2026
Safety Precautions and Protective Gear for Spider Nest Removal
Removing spider nests safely starts with preparation, not bravery. Most U.S. household spiders are harmless, but a few carry medically significant venom, and disturbing an egg sac can release hundreds of hatchlings at once (the CDC).
Protective Clothing and Gloves
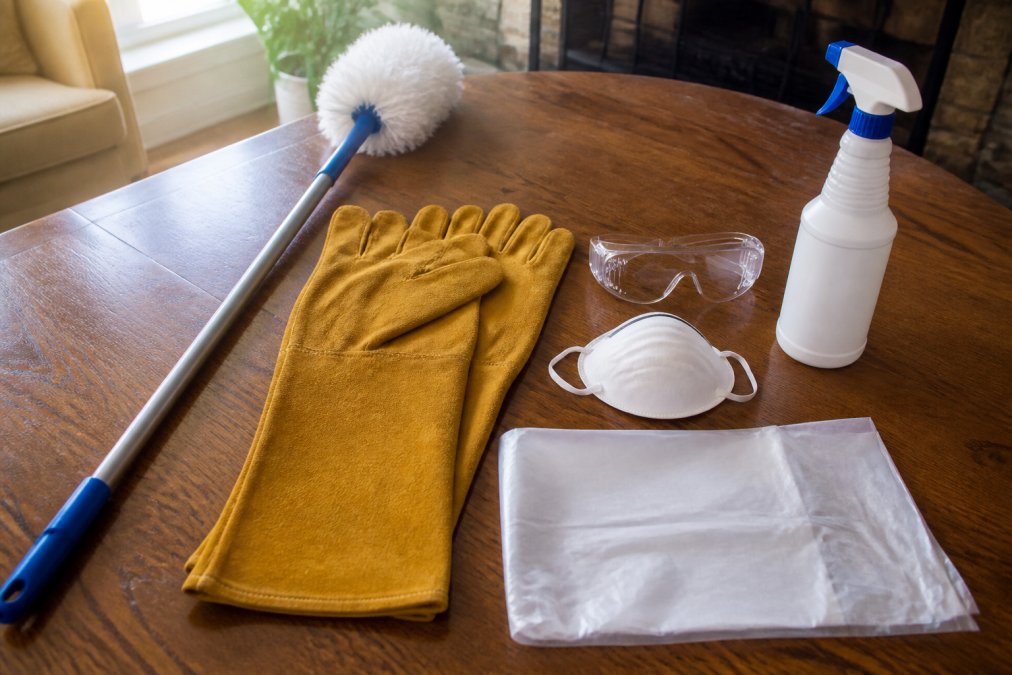
Wear long sleeves, closed-toe shoes, and thick protective gloves that cover your wrists. A long-handled tool keeps your hands well away from crevices where spiders hide, and a dust mask helps if you are working near heavy dust or debris. If you have known allergies or a history of strong reactions to bites, ask someone else to handle the removal.
Managing Arachnophobia During Removal
Arachnophobia is common with this task, so plan around it rather than fighting through it. Work in daylight with a flashlight, keep a clear exit path, and tackle one web at a time. If an egg cluster stops you cold, hand the job to a professional.
Never reach into a gap you cannot see into. Bites in the home most often happen when someone puts a bare hand into a crevice, shoe, or woodpile where a spider was sheltering.
Spider Egg Sac Identification: What You Are Looking At
Spider egg sac identification is the step most homeowners skip, yet it determines how carefully you must work. An egg sac is a silk casing protecting a cluster of eggs, dozens to hundreds of hatchlings. Destroy it carelessly and you scatter the contents instead of removing them.
Visual Identification Guide for Common Household Spider Egg Sacs
Most sacs fall into a few recognizable shapes. Knowing which one you are facing tells you how fragile it is and how likely it is to burst.
| Sac Appearance | Typical Location | Handling Risk |
|---|---|---|
| White, papery, teardrop-shaped | Wall corners, ceiling joints | Low; firm casing |
| Fluffy, cotton-like mass | Behind furniture, closets | Moderate; tears easily |
| Round, tan, paper-like | Under eaves, window frames | Low; sturdy |
| Irregular, web-wrapped cluster | Basements, crawl spaces | High; may scatter on contact |
Species-Specific Removal Risks
Not every sac carries the same risk. The widow family, including black widows, produces pear-shaped sacs attached near ground level in garages, sheds, and woodpiles (extension.psu.edu). The recluse family favors quiet spaces like closets and stored boxes. Both deserve gloves and a long-handled tool, never bare hands. If you suspect either, do not handle the sac yourself.
Tools and Techniques for Removing Spider Nests Safely
You do not need a cabinet full of equipment. A cobb web duster, a long-handled tool, protective gloves, and a vacuum with a hose attachment cover nearly every situation a homeowner will face.
Manual Extraction and Web Removal
Work from the top down. Wind the silk around the tool head rather than yanking it free, keeping the sac intact and debris off you. Detach the sac whole, place it directly into a sealed bag, then wipe the surface, residual silk gives spiders an easy anchor to rebuild.
Using a Vacuum Attachment for Egg Sacs and Debris
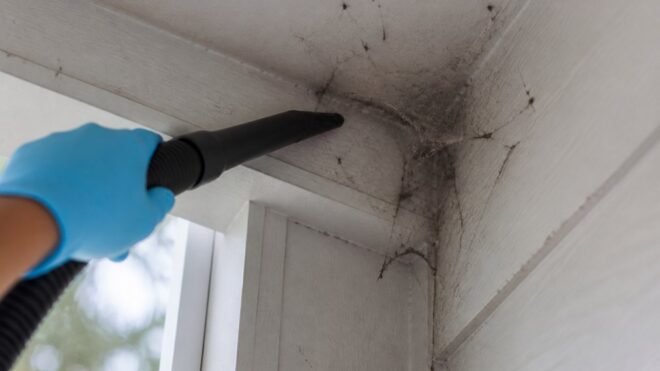
A vacuum with a hose attachment clears large webs and loose debris fastest. Move slowly, keep the nozzle against the surface so the sac goes in whole, and empty the canister outdoors into a sealed bag immediately.
Fit the vacuum hose with a piece of nylon or a fine mesh screen. It catches the sac before it reaches the canister, so you can seal and dispose of it without opening the machine.
How to Dispose of Spider Egg Sacs and Nest Debris
Disposal is where careful removal can still go wrong. A sac left in an indoor trash can often hatches on schedule, undoing your work. Eggs inside a sac are largely insulated from indoor temperature swings, and many common household species complete development in roughly two to four weeks (extension.umn.edu). A sac tossed in a bedroom wastebasket on Friday can be a room full of spiderlings by the following weekend.
Outdoor Disposal Methods
Seal the sac and web debris in a plastic bag, then place it in an outdoor bin with a closed lid. Crushing the sac first is effective but must be done outdoors with gloves on. Never compost spider egg sacs, a warm, humid pile full of small insects is close to an ideal nursery.
If you want maximum certainty, the sequence that most pest control technicians use is:
- Detach the sac whole with a long-handled tool.
- Drop it directly into a sealable plastic bag without touching it.
- Seal the bag, then place that bag inside a second sealed bag.
- Crush the sealed bag against a hard outdoor surface (driveway, patio) to rupture the sac inside containment.
- Place the sealed, crushed bag in an outdoor bin with a closed lid.
Double-bagging before crushing matters because a single bag can tear on the driveway and release the contents you were trying to contain.
Post-Removal Sanitation and Crevice Cleaning
Sanitization separates a one-time removal from a permanent fix. Spiders leave silk draglines and, in many species, contact pheromones on surfaces they travel, deposits that make the same corner appealing to the next spider. Vacuuming the visible web is not enough; you have to break the chemical trail.
Work through these steps after the sac and web are gone:
- Vacuum first, don’t wipe first. A hose attachment lifts loose silk, dust, and stray eggs before a cloth spreads them. Empty the canister outdoors into a sealed bag immediately.
- Wipe with a damp cloth and household cleaner. Focus on corners, baseboards, and crevices where the nest sat. A 1:1 white vinegar-and-water solution is a common low-cost option for hard surfaces.
- Target the re-entry points. Window frames, door thresholds, utility penetrations, and the gap behind baseboards are the spots spiders reoccupy first. Wipe or vacuum these even if no web was visible.
- Address the food source. Spider activity tracks insect activity. If you are finding sacs repeatedly in the same room, look for the insects that are drawing spiders in, ants, gnats, silverfish, stored-product pests, and treat that problem too.
A blacklight flashlight can help you spot residual silk draglines in dim corners that are easy to miss in normal light. Silk reflects UV, so the trails show up as faint bright lines against the wall.
Never vacuum a suspected widow or recluse sac with a standard household vacuum and then leave the canister attached to the unit indoors. If the sac ruptures inside, spiderlings can escape through the exhaust or when the canister is later opened. Empty outdoors, into a sealed bag, immediately.
What to Do With the Vacuum Afterward
If you vacuumed any part of the removal, treat the unit as contaminated until cleaned. Seal the bag or empty the canister outdoors, then wipe the canister interior and hose end with a damp cloth. Store the vacuum outdoors or in a garage for a day or two before bringing it back inside, skipping this is why people find a spiderling on the vacuum weeks later.
Natural Spider Repellent for Home and Preventative Measures
Prevention is cheaper than removal and needs no harsh chemicals. Natural spider repellent for home use works best as a layered routine, not a single spray. Most DIY attempts fail because people spray once and assume the job is done. Spiders leave not because of a smell but because the surface is no longer good for building a web and hunting. Repellents irritate the sensory hairs on a spider’s legs, and that effect fades as the oil evaporates or dust settles.
Eco-Friendly Deterrents: What Actually Works and How to Apply It
These are the options used in homes where harsh chemicals are off the table. None kill spiders; they deter them, so reapplication is part of the routine.
- Peppermint oil spray. Mix roughly 10 to 15 drops of peppermint essential oil per cup of water, plus a splash of unscented dish soap to emulsify. Spray corners, baseboards, window frames, and door thresholds. Reapply every 5 to 7 days, more often in humid rooms. Keep cats and dogs away until dry, concentrated peppermint oil is not safe for pets to ingest or lick.
- Citrus spray. Citrus peel oils (limonene is the active compound) are a common deterrent. Simmer peels in water, cool, strain, and spray. Milder than peppermint and needing more frequent reapplication, it suits kitchens where strong scents are unwelcome.
- White vinegar. A 1:1 vinegar-and-water spray wiped onto hard surfaces is more of a cleaning and trail-breaking step than a true repellent. It strips the silk and pheromone residue that makes a corner attractive, which is why it pairs well with the sanitation steps above.
- Diatomaceous earth (DE). Food-grade DE is a fine powder from fossilized diatoms that works mechanically: particles abrade the waxy exoskeleton layer, drying the spider out. Dust a thin layer along baseboards, in cracks, and behind appliances. It must stay dry, so reapply after mopping or in humid areas. Wear a dust mask, airborne dust irritates lungs.
- Cedar and eucalyptus. Cedar blocks, cedar oil, and eucalyptus sachets are traditional closet and storage deterrents. They are best used as a supplement in enclosed spaces like closets and storage bins rather than as a whole-room treatment.
No natural repellent is a one-and-done fix. The realistic routine is: spray or dust every 5 to 7 days for the first month, then taper to every 2 to 3 weeks once activity drops. Pair it with the sanitation and exclusion steps below, or the spiders will simply move a few feet and rebuild.
Chemical Deterrents and Residual Sprays
Chemical deterrents and residual sprays suit heavier pressure. They leave a longer-lasting residue, so they need reapplication less often than natural sprays. The trade-off: they are pesticides, with label requirements on ventilation, drying time, and distance from food-prep surfaces, children, and pets. Follow the label exactly. If unsure what fits your household, especially with pets, young children, or respiratory sensitivity, a licensed technician can advise on targeted treatment rather than a blanket spray.
Home Maintenance to Prevent Re-Infestation
Exclusion and clutter control do more than any spray. Spiders follow their prey, so controlling other insects removes the food source that keeps spider activity high.
- Seal cracks around windows, doors, and utility lines with caulk or expanding foam
- Install or repair door sweeps and window screens
- Clear clutter from basements, garages, and closets, stacked cardboard is a favorite harborage
- Trim vegetation away from exterior walls and keep mulch a few inches back from the foundation
- Store firewood off the ground and away from the house
- Check stored boxes and seasonal items before bringing them inside
- Fix leaky faucets and pipes, moisture draws the insects spiders hunt
- Reduce outdoor lighting near entry doors, or switch to yellow bug bulbs that attract fewer insects
Home maintenance is the most effective and cheapest preventative measure. A weekend sealing gaps and clearing clutter outperforms a season of spraying.
When to Call Professional Pest Control for Spider Infestations
Call a professional when you find multiple egg sacs, suspect widow or recluse species, or when bites have occurred at home. Repeated sightings after your own removal attempts point to a deeper infestation. For anyone with arachnophobia, a professional visit removes the hardest part entirely.
This is where Zoifia Pest Control fits. Our licensed and insured technicians handle removal and follow-up, and every job is backed by a 90-day guarantee with no long-term contract. If pests return within that window, the follow-up is covered.
Frequently Asked Questions
How do I get rid of a spider nest in my house?
Put on protective gloves and a long-sleeved shirt. Use a vacuum attachment or a long-handled tool to remove the web and egg sac, then seal the debris in a plastic bag and dispose of it outdoors. Wipe the area with a damp cloth and apply a natural spider repellent like vinegar or peppermint oil to discourage spiders from returning. If you have a large infestation or see medically significant species, call a licensed pest control professional.
How do you know if a spider laid eggs in your house?
Look for small, silk-wrapped sacs in corners, behind furniture, or in crevices. Spider egg sacs vary by species but are usually white, tan, or brown and about the size of a pea to a golf ball. Some sacs contain dozens to hundreds of eggs. If you see tiny spiderlings or a sudden increase in spider activity, an egg sac likely hatched nearby. Check basements, closets, and window frames regularly.
What is the safest way to dispose of a spider egg sac?
Never crush an egg sac indoors because some species can survive and scatter. Instead, vacuum it up using a hose attachment, then immediately empty the vacuum canister into a sealed plastic bag. Alternatively, use a long-handled tool to dislodge the sac into a bag. Seal the bag tightly and place it in an outdoor trash bin. For large or sticky sacs, wear protective gloves and avoid direct contact with the silk casing.
Will vinegar kill spider egg sacs?
White vinegar can deter spiders and may damage egg sacs on contact, but it does not reliably kill all eggs inside the silk casing. For effective removal, physically remove the sac first, then spray the area with a vinegar-and-water solution (1:1 ratio) as a natural spider repellent. Reapply weekly for best results. Vinegar is safe for most surfaces but avoid using it on natural stone.
Spider nests are a manageable problem, but the margin for error is real: a torn sac or a missed crevice can restart the cycle within weeks. If you would rather not test that margin yourself, Zoifia Pest Control offers fast response, no-contract service, and a 90-day guarantee covering ants, roaches, rodents, and other household pests. Get A Quote and let a licensed technician clear the nest, sanitize the area, and set up prevention so it stays gone.