Last Updated: October 24, 2026
Quick Summary
The signs of carpenter ant damage in kitchen cabinets include frass piles below small kick holes, trailing worker ants, hollow-sounding wood, rustling noises, winged ants, and damp wood near sinks or dishwashers. Carpenter ants tunnel through wood rather than eat it, so damage often stays hidden behind an intact cabinet face.
- Carpenter ant frass is coarse and gritty with dark specks, unlike uniform termite pellets or powdery sawdust.
- Clean a frass pile, photograph it, and check again in three days; a new pile means active damage.
- Set aside about 30 minutes to inspect a standard run of base and wall cabinets.
- Never use household insecticide inside a cabinet that holds food, dishes, or utensils.
- Treating ants without fixing the moisture source usually leads to a return.
Table of Contents
- Carpenter Ant Damage in Kitchen Cabinets: What Homeowners Miss
- 7 Warning Signs of Carpenter Ant Damage in Kitchen Cabinets
- Carpenter Ant Frass: How to Tell It From Ordinary Sawdust
- Carpenter Ant Damage vs Termite Damage: Key Differences
- Carpenter Ant Inspection: A Safe Step-by-Step Cabinet Check
- How to Get Rid of Carpenter Ants in Cabinets
- Book a Carpenter Ant Inspection Before the Damage Spreads
- Frequently Asked Questions
Carpenter Ant Damage in Kitchen Cabinets: What Homeowners Miss
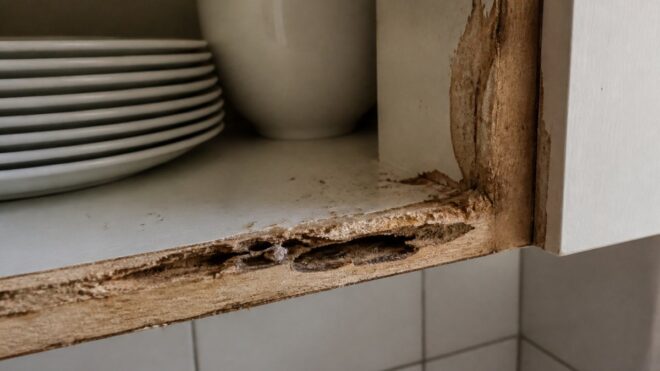
Carpenter ants damage wood slowly, quietly, and almost always out of sight. The earliest signs of carpenter ant damage in kitchen cabinets are easy to miss because the insects work from the inside out, hollowing wood behind a drawer or under a shelf while the cabinet face still looks fine.
This guide covers the seven warning signs, how to tell carpenter ant frass from ordinary sawdust, and how to check your own cabinets safely.
Why Cabinets Are a Prime Target
Kitchen cabinets offer everything a carpenter ant colony needs: damp wood, hidden voids, and steady moisture.
Carpenter ants do not eat wood. They tunnel through it to nest, pushing out debris called frass, often the first visible clue, but it lands in the back corner of a cabinet where nobody sweeps.
7 Warning Signs of Carpenter Ant Damage in Kitchen Cabinets
Here are the seven signs we check first, in order, the first few need no tools.
1. Frass, Sawdust, and Wood Shavings
Small piles of sawdust-like material are the most common early sign. Carpenter ants expel wood fragments, insect parts, and soil from their tunnels, and it collects below small holes or along shelf edges. If fresh frass returns within days of sweeping, ants are actively working nearby.
2. Trailing Ants and Worker Activity
Worker ants moving in a steady line along a cabinet edge or baseboard point to a nearby nest. Look at dawn or late evening, when carpenter ants are most active. A single ant means little; a repeated trail means the colony has a route into the kitchen.
3. Small Holes, Cracks, and Openings
Carpenter ants create small openings, called kick holes, where they push out debris. Check the back panel, the underside of shelves, and the frame near the wall. A clean-edged hole with frass below it is a strong sign.
4. Hollow or Papery Wood
Tap the cabinet sides and shelves with a screwdriver handle. Solid wood gives a dull thud; tunneled wood sounds thin and hollow. If a suspect surface gives slightly or feels papery, the wood behind it may be mostly gone.
5. Rustling Noises Behind Walls and Cabinets
A faint rustling behind a cabinet or wall often means an active colony; carpenter ants make noise moving through tunnels and shifting debris. Press your ear to the cabinet at night, a dry, crackling sound is worth investigating.
6. Winged Ants and Discarded Wings
Winged ants, called swarmers, appear when a colony is mature and ready to expand. Look near a cabinet, window, or light fixture, and check for discarded wings on a shelf or windowsill. Swarmers indoors usually mean the nest is inside the building.
7. Moisture Damage and Damp Wood Nearby
Damp wood attracts carpenter ants. Check for water stains, soft spots, and warped panels, especially under the sink and around the dishwasher. Moisture damage alone is not proof of ants, but it raises the risk and often explains why the colony chose that spot.
Carpenter Ant Frass: How to Tell It From Ordinary Sawdust
Carpenter ants do not eat wood. They excavate galleries and push the leftovers out through small kick holes. That frass is a mix of wood fragments, soil, dead insects, and sometimes insulation or nest debris. Because the ants tunnel rather than feed, the frass is coarse and uneven, not the fine powder a saw leaves, the single most useful clue in a cabinet.
What Frass Actually Contains
A flashlight or zoomed phone photo usually shows three things:
- Wood fragments in a range of sizes, from splinter-like pieces to coarse grains
- Dark specks that may be soil, insect parts, or droppings
- A gritty feel when you rub it between your fingers, unlike the soft, powdery feel of fresh sawdust
Carpenter ants often push frass out in a cone-shaped pile directly below the opening, on the cabinet floor, a shelf, or the corner where the back panel meets the side.
Frass vs. Ordinary Sawdust vs. Other Debris
| What you are looking at | Texture | Color | Where it collects | Reappears after cleanup? |
|---|---|---|---|---|
| Carpenter ant frass | Coarse, gritty, mixed sizes | Light wood plus dark specks | Below a small hole or along a seam | Yes, within days if ants are active |
| Sawdust from a repair | Uniform, soft, powdery | One color, usually light | Near where the cut was made | No |
| Termite frass | Tiny, uniform, pellet-like | Wood-colored | Pushed out of small holes, often in piles | Yes, if termites are active |
| Powderpost beetle dust | Fine, talc-like | Pale | Below exit holes | Yes, if beetles are active |
| Dry rot or crumbling wood | Flaky, soft | Dark brown to gray | Where wood is decaying | Not applicable |
Termite frass is most often confused with carpenter ant frass, but termites produce uniform pellets while carpenter ants produce irregular fragments. If the material looks like tiny identical grains, treat it as a termite question and get it identified.
Why the Location Matters More Than the Pile
Sawdust on a countertop is usually from a repair. Frass on the cabinet floor under a small hole in the back panel is a different story. In cabinets, frass almost always collects in one of four places:
- On the cabinet floor directly below a kick hole in the back panel
- Along the seam where the back panel meets a side or the floor
- On a shelf below a hole in the shelf above
If you find frass in one of those spots, clean it up, photograph the area, and check again in three days. A new pile means active carpenter ant damage; no new pile could mean old activity or a colony that moved.
Frass vs. Moisture Damage: A Quick Diagnostic
Moisture damage and carpenter ant damage often appear together, which is why the two get confused. Use these cues:
- Staining and swelling without holes or frass points to a water problem first. Fix the leak and dry the wood before assuming ants.
- Holes with frass below them point to an excavating insect. The moisture may have attracted the ants in the first place.
- Soft, crumbly wood with no frass is more consistent with rot or fungal decay than with ants.
Frass tells you an insect is excavating wood. Moisture tells you why the wood was attractive. In cabinets, you usually need to address both to solve the problem.
If you are unsure which pest you have, our guide on ants versus termites walks through the differences in more detail.
Carpenter Ant Damage vs Termite Damage: Key Differences
Carpenter ant damage and termite damage look similar at a glance, but the details differ. Carpenter ants tunnel smooth, clean galleries and leave wood looking excavated but intact.
Use this table to compare the two:
| Feature | Carpenter Ant Damage | Termite Damage |
|---|---|---|
| Galleries | Smooth, clean tunnels | Rough, honeycomb pattern |
| Wood surface | Intact, with kick holes | Soft, crumbling, or hollow |
| Debris | Frass piles below holes | Mud tubes, no frass piles |
| Ants seen | Large workers, often at night | Rarely seen; swarmers only |
| Moisture link | Strong; damp wood attracts them | Weaker; dry wood is also attacked |
If you are unsure which pest you have, our guide on ants versus termites walks through the differences in more detail.
Carpenter Ant Inspection: A Safe Step-by-Step Cabinet Check
Most inspection advice says to look for frass and tap on wood.
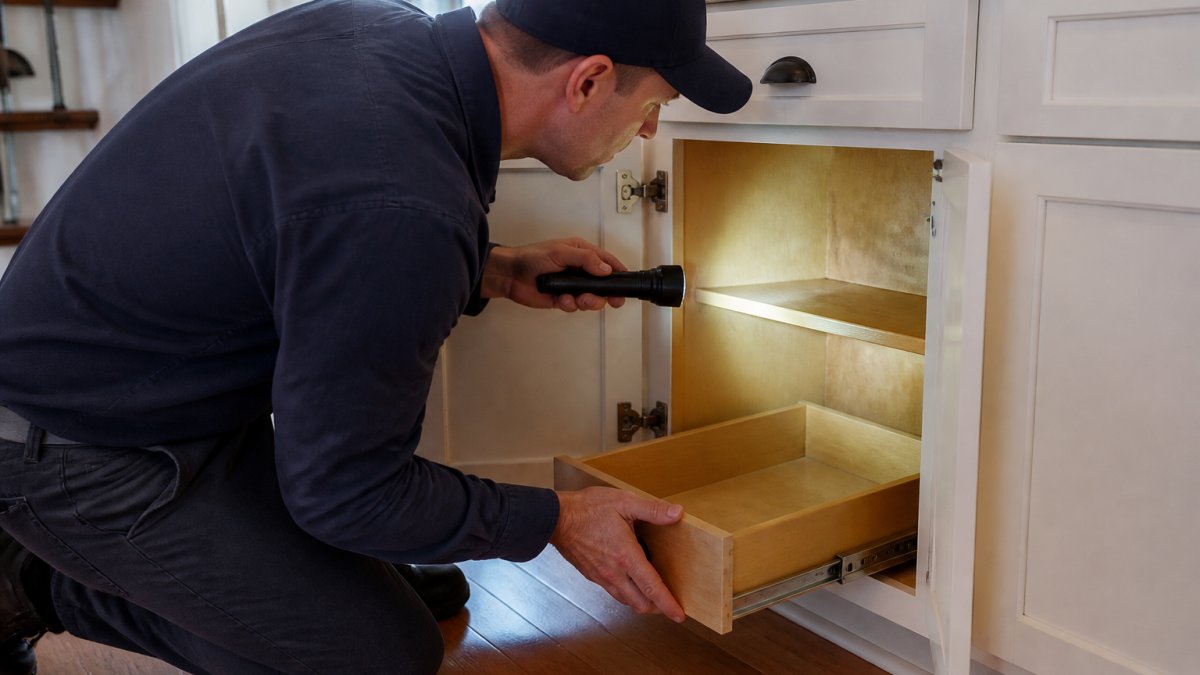
Set aside about 30 minutes for a standard run of base and wall cabinets. You need a flashlight, a flat-head screwdriver, a small hand mirror, a few zip-top bags, and your phone.
Before You Open Anything
- Empty one cabinet at a time. Stack dishes on a towel on the counter, not on the floor, so you do not track frass across the kitchen.
- Lay down a light-colored sheet of paper or a white paper plate under the area you are checking. Frass shows up against white, and you can bag the paper as a sample.
- Photograph the cabinet interior before you touch it. Wide shot first, then close-ups of any stain, hole, or pile. Include a coin or ruler for scale.
Step 1: The Sink Base and Dishwasher Bay
Open the doors under the sink and pull everything out, including the trash can and cleaning caddies. Shine the light along the cabinet floor and back panel. Look for:
- Water staining or swollen particleboard around the supply lines and drain trap
- Frass caught in the corner where the side panel meets the floor
- Gaps where pipes pass through the cabinet back, since these are common entry points
Run your hand along the underside of the sink rim: a slow drip that never reaches the floor can keep the frame damp for years, exactly what carpenter ants look for. Check the dishwasher bay the same way, especially the wood beside the unit.
Step 2: Toe Kicks and the Cabinet Base
The toe kick is the recessed panel at the bottom front of base cabinets. It stays dark, is rarely cleaned behind, and sits near the floor where moisture collects. Use the mirror and flashlight to look into the gap between the toe kick and the cabinet floor, and sweep a finger along the seam; gritty material or a line of fine debris is worth a closer look.
Step 3: Back Panels and Wall Gaps
The back panel of a base cabinet is usually thin plywood or hardboard, and it is often the first place ants tunnel because it stays humid against the wall. Shine the light along the seams where the back meets the sides and the floor.
Step 4: Shelves, Shelf Standards, and Drawer Glides
Pull out every adjustable shelf and set it aside. Check the shelf pin holes and the shelf standards for debris. Carpenter ants will use existing holes and gaps rather than cutting new ones when they can, so hardware cutouts, hinge mortises, and drawer glide screws are all worth a look.
Step 5: Cabinet Doors, Frames, and Crown
Open and close each door slowly and watch the hinges. Frass sifting out of a hinge mortise is a sign ants are working inside the frame. Check the top rail of wall cabinets and any crown molding, since warm air rises and these areas stay dry but hidden.
Step 6: Follow the Trail, Then Stop
If you find workers, watch where they go rather than following them with a spray can. A trail that disappears into a gap behind the cabinet or into a wall void tells you the nest is not in the cabinet box itself.
Do not use a household insecticide inside a cabinet that holds food, dishes, or utensils. Beyond the contamination risk, surface sprays kill the workers you can see and rarely reach the colony, which can split the nest and make it harder to locate.
What to Document
A useful record for a professional includes:
- Photos of every frass pile with something for scale
- The exact cabinet location (for example, “base cabinet left of the sink, back panel lower corner”)
- Whether frass returned after you cleaned it, and how many days it took
For a broader look at what damage looks like across a home, see our guide on identifying carpenter ant damage.
How to Get Rid of Carpenter Ants in Cabinets
Getting rid of carpenter ants in cabinets means finding and treating the nest, not just killing the ants you see. Store-bought sprays kill workers but leave the colony intact.
A lasting fix follows a clear order:
- Locate the nest. Follow ant trails and check for frass piles and hollow wood.
- Fix the moisture source. Repair leaks and dry out damp wood, or ants will return.
- Treat the nest directly. This is where professional help matters most.
Our carpenter ant control service targets the colony itself, not just the ants on the surface.
Book a Carpenter Ant Inspection Before the Damage Spreads
Carpenter ant damage gets worse with time. A small colony today becomes a structural problem later. If you have found frass, trailing ants, or hollow wood in your cabinets, an inspection settles the question fast.
Not sure whether to call? Our guide on when to hire professional pest control for ants covers the decision points. You can also read about the benefits of annual professional pest inspections if you want to stay ahead of problems.
At Zoifia Pest Control, we offer fast response, no long-term contracts, and a 90-day guarantee on every treatment.
Frequently Asked Questions
How can I tell if carpenter ants are damaging my kitchen cabinets?
Look for frass (sawdust-like debris) collecting on shelves or the cabinet floor, small holes in the wood, hollow-sounding panels, and ants trailing along edges or pipes. Rustling noises behind the cabinet and winged ants near windows are also clues. Because carpenter ant damage starts inside the wood, a flashlight inspection of the back panels and shelf edges matters more than a glance at the doors.
What does carpenter ant frass look like compared to ordinary sawdust?
Carpenter ant frass is not fine powder. It looks like coarse wood shavings, tiny fragments, and pellet-shaped bits mixed with insect parts, and it often piles up below small holes or along shelf edges. Ordinary sawdust from drilling or sanding is finer and more uniform. If the debris reappears after you clean it, active excavation is likely underway.
How do I tell carpenter ant damage from termite damage?
Carpenter ants tunnel through wood and push frass out through openings, so you see debris outside the wood and galleries that are smooth and clean inside. Termites eat wood and fill their tunnels with mud and soil, and you rarely see pellets. Termite damage tends to look crumbly or hollowed with mud tubes nearby, while carpenter ant damage shows clean galleries and shaving piles.
How do I get rid of carpenter ants in cabinets?
Start by locating the nest, since treating visible ants alone rarely solves it. Clean out frass, fix leaks or damp wood, and seal exterior entry points like utility lines and vents. For an active infestation in cabinets, a licensed professional can apply targeted treatment. Zoifia Pest Control backs its work with a 90-day guarantee.
Carpenter ants rarely announce themselves. They tunnel quietly until the wood gives way, and by then the repair bill is bigger than the pest bill. If you have spotted even one warning sign, do not wait for the next season. Get started with Zoifia Pest Control and schedule an inspection that finds the nest before the damage spreads.

