Table of Contents
- How to Prevent Bed Bugs When Moving Into a New Apartment
- Step 1: Conduct a Pre-Move Inspection of Your Belongings
- Step 2: How to Treat Furniture for Bed Bugs Before Moving
- Step 3: Bed Bug Inspection Checklist for Renters
- Step 4: How to Seal Your Apartment From Bed Bugs
- Step 5: Declutter and Sanitize Before Move-In
- Landlord Responsibility for Bed Bugs: Know Your Rights
- Common Mistakes to Avoid When Preventing Bed Bugs
Last Updated: June 27, 2026
Moving into a new apartment brings excitement, but also risk. One of the most persistent nightmares for renters is discovering bed bugs in their new home or accidentally bringing them from their old place. Learning how to prevent bed bugs when moving is one of the most practical steps you can take to protect your peace of mind and avoid a costly infestation.
Bed bugs are small, resilient parasites that hide in furniture, mattresses, and walls. They travel easily in boxes, bags, and clothing, making moving season particularly risky. Below, we’ll walk you through a complete five-step system for preventing bed bugs during your move, including inspection checklists, treatment methods, apartment walkthroughs, and your legal rights as a tenant.
Why Bed Bug Prevention Matters During a Move
Moving is when bed bugs spread fastest. A single pregnant female bed bug hidden in a box spring can establish an infestation in your new apartment within two weeks. Professional elimination can cost several hundred dollars, not to mention the stress and disruption to your living situation.
Prevention addresses both directions: treating what you bring in and inspecting what’s already there. In apartment complexes, bed bugs can travel through walls, electrical outlets, and shared pipes, threatening multiple units.
The best time to prevent a bed bug problem is before you move a single item into your new apartment. Once established, elimination requires professional heat treatment or chemical applications that disrupt your living situation for days.
What You’ll Need Before You Move
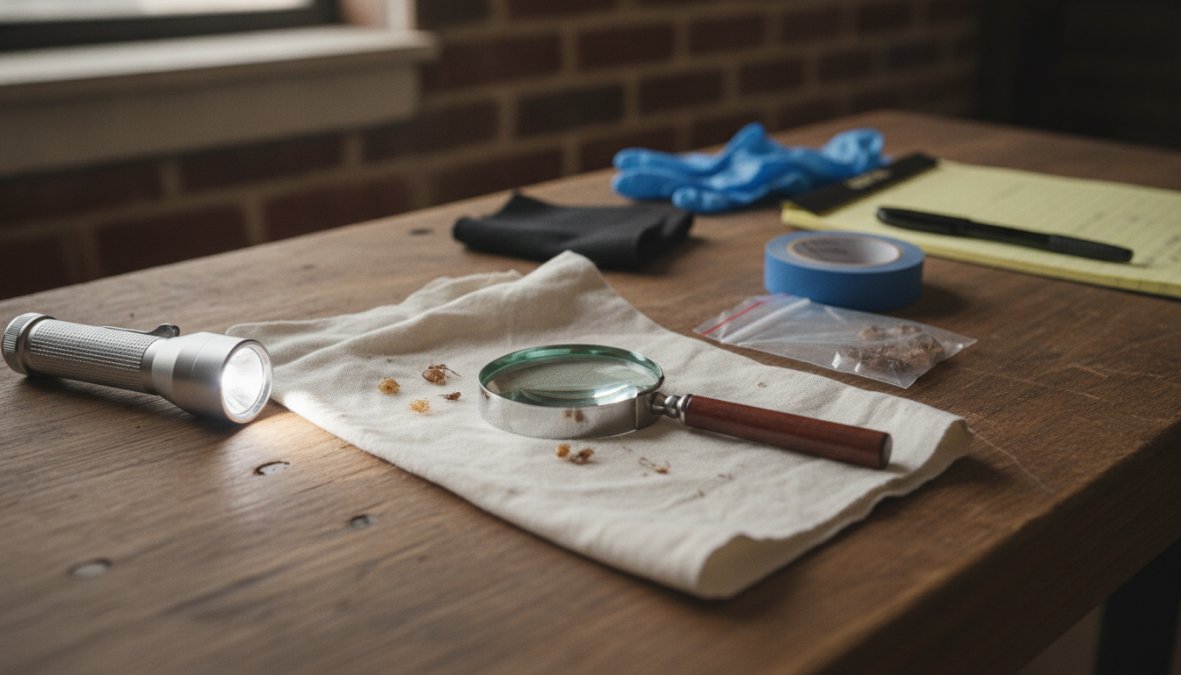
Gather these tools and materials before moving day:
- A flashlight or headlamp with strong batteries
- A magnifying glass (bed bugs are typically 4-5mm long)
- Clear plastic bags in multiple sizes
- Painter’s tape or masking tape
- Silicon caulk and a caulking gun
- A handheld vacuum with a HEPA filter
- Mattress encasement covers
- A thermometer or temperature-monitoring device
- A notebook or phone to document findings
- Contact information for a licensed pest control professional
Step 1: Conduct a Pre-Move Inspection of Your Belongings
Before a single box leaves your old apartment, inspect everything you plan to take. This is the most critical prevention step.
Identifying Bed Bug Signs: Fecal Spots, Exoskeletons, and Egg Clusters
Bed bugs leave behind telltale evidence. Fecal spots are small, dark brown or black dots about the size of a pinhead that cluster in lines or patterns. Exoskeletons are tan or brown, translucent, shed outer shells roughly the shape of a bed bug. Egg clusters are tiny, cream-colored, and difficult to see without magnification. Live bed bugs are reddish-brown after feeding, tan or brown when unfed, roughly the size of an apple seed.
If you find even ONE live bed bug or confirmed fecal spot, do not move that item. Isolate it immediately and contact a pest control professional. Moving an infested item guarantees you’ll establish a problem in your new home.
Checking Common Hiding Places in Furniture and Boxes
Bed bugs flatten their bodies to fit into spaces as thin as a credit card. When inspecting your belongings, check these high-risk areas:
Mattresses and box springs: Examine seams, piping, and the underside. Peel back the fabric lining on the bottom of box springs.
Upholstered furniture: Examine seams, under cushions, and where fabric meets wood.
Wooden furniture: Check drawer joints, undersides, and carved details where wood pieces meet.
Cardboard boxes: Open each box and inspect the interior, especially corners and folds.
Clothing and textiles: Inspect folded clothing, blankets, and curtains for fabric folds and seams.
Electronics and picture frames: Check behind picture frames, inside clock radios, and crevices of computer equipment.
Spend at least 5-10 minutes on each major piece of furniture.
Step 2: How to Treat Furniture for Bed Bugs Before Moving
If you’ve identified bed bugs or suspect exposure, treat items before moving them. There are three primary approaches: heat treatment, chemical treatment, and containment.
Heat Treatment Protocols Using Your Laundry Dryer
Heat is one of the most effective bed bug elimination methods. Bed bugs cannot survive temperatures above 118°F (48°C) for more than 90 minutes.
For washable items (clothing, bedding, linens, towels):
- Wash in hot water (at least 130°F).
- Dry on the highest heat setting for at least 60 minutes.
- Immediately place dried items in sealed plastic bags until move-in day.
For items that cannot be washed (stuffed animals, pillows):
- Place items in the dryer on high heat for 60-90 minutes.
- Seal treated items in plastic bags immediately after drying.
For furniture:
Heat treatment of large furniture requires professional equipment. A pest control professional can use portable heat chambers or whole-room heat treatment to reach necessary temperatures throughout the item.
In winter, you can use outdoor freezing temperatures for some items. Bed bugs die at temperatures below 32°F after 4-5 days of exposure.
Chemical Treatment and Integrated Pest Management Options
Chemical treatment involves applying residual insecticides to furniture and personal items. A licensed pest control professional can apply residual insecticides in a controlled manner, which is far more effective than DIY treatments.
Integrated pest management combines multiple approaches: inspection, heat treatment, chemical application, and monitoring.
Mattress Encasement and Plastic Bag Containment
Mattress encasements are specialized covers that trap bed bugs inside and prevent new ones from entering.
How to use a mattress encasement:
- Purchase a high-quality encasement designed specifically for bed bugs.
- Inspect the mattress thoroughly for bed bugs before sealing.
- Encase both the mattress and box spring.
- Leave the encasement sealed for at least one year.
- Inspect the outside monthly for bed bugs trying to enter.
Plastic bag containment for smaller items:
Seal items that cannot be heat-treated in clear plastic bags. Label each bag with its contents and the date.
Step 3: Bed Bug Inspection Checklist for Renters
Before you move into your new apartment, conduct a thorough inspection. This is your opportunity to identify existing bed bug problems before your belongings enter the space. Schedule at least 45 minutes to an hour.
What to Inspect During Your Apartment Walkthrough
Inspect the bedroom first (where bed bugs are most commonly found):
- Examine all corners and seams of the existing mattress and box spring for fecal spots, exoskeletons, and live bugs.
- Check the headboard, footboard, and bed frame for cracks and crevices.
- Inspect nightstands, dressers, and other bedroom furniture.
- Check walls for cracks, particularly around baseboards and electrical outlets.
Inspect the living areas:
- Examine any upholstered furniture left in the apartment.
- Check behind pictures, mirrors, and wall decorations.
- Look at baseboards, door frames, and window sills.
- Inspect closet shelves and rods.
Inspect the bathroom and kitchen:
- Check behind and under sinks.
- Look at baseboards and corners.
Inspect entry points:
- Look around door frames and window frames.
- Check electrical outlets and switch plates.
- Examine any cracks in walls or flooring.
Take photos of any suspicious areas. If you find signs of bed bugs, document them and inform your landlord immediately in writing.
Red Flags and Monitoring Devices to Request
Certain signs indicate an existing bed bug problem: fecal spots on walls or baseboards, exoskeletons, live bed bugs, musty odor, or recent pest control treatments.
If you find any of these signs, do not move in until the problem is professionally treated. Request that your landlord hire a licensed pest control professional.
Monitoring devices are passive traps that catch bed bugs without chemicals. Request that your landlord install interceptor cups under the legs of your bed and furniture.
If your landlord refuses to treat a confirmed bed bug problem before you move in, you may have legal grounds to break your lease or withhold rent. Document everything and consult your local tenant rights organization.
Step 4: How to Seal Your Apartment From Bed Bugs
Once you’ve moved in and confirmed the apartment is bed bug-free, take steps to prevent bed bugs from entering. Sealing cracks and crevices reduces hiding places and slows the spread of bed bugs if they do enter from neighboring units.
Sealing Cracks and Crevices with Silicon Caulk
Bed bugs hide in cracks as thin as a credit card. Sealing these spaces eliminates hiding spots and makes monitoring easier.
Priority areas to seal:
- Cracks in baseboards and where baseboards meet the wall
- Gaps around electrical outlets and light switches
- Cracks in walls around windows and doors
- Gaps between the wall and furniture
- Cracks in wooden bed frames and furniture
- Gaps around pipes under sinks
How to seal:
- Clean the area with a damp cloth and let it dry completely.
- Apply silicon caulk along the crack using a caulking gun.
- Smooth the caulk with a wet finger or caulk tool.
- Let it dry according to product instructions (typically 24 hours).
Do not seal the space between your bed and the wall completely. You need access to inspect for bed bugs. Instead, seal cracks within the baseboards and wall surfaces, then position your bed at least 6 inches away from the wall.
Preventing Cross-Contamination in Communal Complexes
Apartment complexes present unique challenges because bed bugs can travel through shared walls, pipes, and electrical conduits.
Reduce transfer risk:
- Seal gaps around pipes and electrical conduits that pass through your walls.
- Install door sweeps on your apartment door.
- Keep your apartment clean and clutter-free.
- Inspect items brought into your apartment.
- Communicate with your landlord about bed bug problems in neighboring units.
In a communal complex, bed bugs in one unit threaten all units. Your landlord has a responsibility to address building-wide infestations.
Step 5: Declutter and Sanitize Before Move-In
A clean, organized apartment gives bed bugs fewer places to hide and makes inspection easier.
Clutter Reduction and Vacuuming Strategies
Before moving your belongings in, the apartment should be as clean and empty as possible.
Declutter the space:
- Remove any items left by the previous tenant (with your landlord’s permission).
- Clear closets, cabinets, and shelves.
Vacuum thoroughly:
- Use a vacuum with a HEPA filter.
- Vacuum all floors, baseboards, and corners.
- Vacuum under furniture and in closets.
- Pay special attention to bedroom areas.
- Empty the vacuum bag or canister into a sealed trash bag and dispose of it outside your apartment.
Clean all surfaces:
- Wipe down shelves, cabinets, and furniture with a damp cloth.
- Clean baseboards.
- Wipe light switches and electrical outlets.
Moving Truck and Container Sanitization
Your moving truck or container is a vehicle for bed bug transport. Sanitize it before loading your belongings.
Before loading:
- Inspect the interior for bed bugs, fecal spots, or exoskeletons.
- Vacuum the interior thoroughly, including corners and crevices.
- Wipe down surfaces with a cloth and mild cleaning solution.
- If the truck shows signs of bed bugs, request a different one.
During loading:
- Place sealed plastic bags and heat-treated items in first.
- Avoid stacking items too tightly.
After unloading:
- Inspect items as you bring them into your apartment.
- Keep items in sealed bags until you’ve confirmed they’re bed bug-free.
| Prevention Step | Timeline | Frequency | Key Action |
|---|---|---|---|
| Pre-move inspection | Before packing | One-time | Inspect all belongings for signs of bed bugs |
| Heat treatment | Before moving | One-time | Wash and dry items on high heat |
| Apartment walkthrough | Before move-in | One-time | Inspect new apartment for existing infestations |
| Sealing cracks | After move-in | One-time | Use silicon caulk to seal hiding places |
| Ongoing monitoring | Monthly | Ongoing | Inspect for bed bugs and set interceptor traps |
Landlord Responsibility for Bed Bugs: Know Your Rights
Bed bug infestations raise important legal questions. As a renter, you have rights regarding habitability and pest control.
Tenant-Landlord Legal Obligations and Documentation
In most jurisdictions, landlords are required to maintain habitable living conditions, which includes freedom from pest infestations. Bed bugs are considered a habitability issue, not a tenant responsibility.
Your rights as a tenant:
- Right to a bed bug-free apartment at move-in
- Right to timely pest control treatment if bed bugs appear
- Right to rent reduction or lease termination if landlord refuses to treat
- Right to withhold rent (in some jurisdictions) if treatment is denied
- Right to break your lease without penalty if the unit becomes uninhabitable
Your landlord’s responsibilities:
- Inspect the apartment before you move in and disclose any known infestations
- Treat confirmed bed bug infestations promptly with a licensed pest control professional
- Pay for all treatment costs
- Treat neighboring units if infestations are present
Documentation is critical:
- Document the date and time you first noticed signs of bed bugs.
- Take photos and videos of fecal spots, exoskeletons, or live bugs.
- Send written notice to your landlord via email or certified mail.
- Keep copies of all correspondence.
- Document any pest control treatments, including the date, time, and company name.
If your landlord fails to treat the problem within a reasonable timeframe (typically 7-14 days), you may have grounds for legal action. Contact your local tenant rights organization or a lawyer specializing in landlord-tenant law.
Never attempt to treat a bed bug infestation yourself without informing your landlord. Your landlord is responsible for hiring a licensed pest control professional. DIY treatments often fail and can make the problem worse.
When to Call a Pest Control Professional
A licensed pest control professional should be involved at three critical points:
1. Pre-move inspection (optional but recommended):
A professional inspection of your current apartment or items you’re moving provides peace of mind.
2. Apartment walkthrough (if you find signs of bed bugs):
If your inspection of the new apartment reveals bed bugs, contact a professional immediately. Your landlord is responsible for hiring and paying for treatment. Do not move in until treatment is complete.
3. Ongoing monitoring (if bed bugs appear after move-in):
If you discover bed bugs in your new apartment despite precautions, contact your landlord immediately and request professional treatment. A licensed pest control professional will conduct a thorough inspection, identify the source, and recommend treatment options.
Common Mistakes to Avoid When Preventing Bed Bugs
Mistake 1: Skipping the pre-move inspection
Many people assume their belongings are bed bug-free and move them without checking. A single missed bed bug can establish an infestation in your new apartment.
Mistake 2: Moving infested furniture
If you find bed bugs in a piece of furniture, do not move it. The cost of replacing it is far less than the cost of treating an infestation in your new apartment.
Mistake 3: Storing items in the moving truck overnight
Bed bugs can hide in trucks and containers. Load your truck as close to move-in time as possible and unload quickly.
Mistake 4: Assuming heat treatment kills all bed bugs
Heat treatment is effective, but items must reach the proper temperature throughout. Professional heat treatment uses specialized equipment to ensure even heating.
Mistake 5: Neglecting to seal cracks after move-in
Sealing cracks eliminates hiding places and makes bed bugs easier to spot.
Mistake 6: Not monitoring after move-in
Set up interceptor traps under your bed and furniture and inspect monthly.
Mistake 7: Treating a suspected infestation without professional help
DIY treatments often fail because they don’t reach all hiding places. A professional inspection confirms whether bed bugs are actually present.
Mistake 8: Failing to communicate with your landlord
If you find bed bugs, inform your landlord immediately in writing. Your landlord is legally responsible for treatment, and documenting your notice protects you legally.
Frequently Asked Questions
How do I make sure I don't bring bed bugs to my new apartment when moving?
Inspect all belongings before packing, especially furniture and textiles. Use heat treatment (laundry dryer at high temperatures) on fabrics and clothing. Seal items in clear plastic bags to prevent cross-contamination during transport. Check your moving truck or container for signs of bed bug infestation before loading. Consider hiring a pest control professional to inspect high-risk items like used furniture before bringing them into your new home.
What should I look for in a bed bug inspection checklist for renters before moving in?
Check mattress seams, box springs, and headboards for fecal spots, exoskeletons, and egg clusters. Inspect cracks and crevices in baseboards, walls, and furniture. Look along window frames and door jambs. Ask your landlord about previous infestations or treatments. Request interceptor cups under bed legs and furniture. Document any signs with photos. If you find evidence of cimex lectularius (bed bugs), notify your landlord in writing and request professional pest control before moving in.
Am I responsible for bed bugs, or is my landlord?
Landlord responsibility for bed bugs varies by location, but most jurisdictions require landlords to maintain habitable premises free from pest infestation. If bed bugs exist before you move in or result from building maintenance issues, your landlord is typically responsible for professional pest control treatment at no cost to you. Document the infestation with photos and written notice. Keep records of all communications. Check your local tenant-landlord laws, as some areas have specific bed bug liability statutes that protect renters from financial responsibility for pre-existing infestations.
How do I treat furniture for bed bugs before moving into my new apartment?
For washable items, use high-temperature laundry (130°F or higher) followed by heat treatment in a dryer on high setting for 30+ minutes. For furniture that can't be washed, use mattress encasement products or seal items in clear plastic bags for 1-2 weeks (bed bugs will die without feeding). For infested furniture, consider professional heat treatment or chemical treatment with residual insecticide applied by a licensed pest control professional. Alternatively, dispose of heavily infested items and replace them. Never bring used furniture into your apartment without thorough inspection and treatment.
This article was written using GrandRanker
