Table of Contents
- Where Roaches Enter Apartments: Common Entry Points
- Best Caulk for Roach Prevention and Sealant Selection
- How to Seal Gaps Around Pipes Under Sink and Other Plumbing
- Sealing Door Sweeps, Windows, and Baseboards
- Using Expanding Foam for Larger Crevices and Utility Lines
- Lease-Compliant Sealing: What Renters Can Do Safely
- When to Call Professional Pest Control for Roaches
- Conclusion
- Frequently Asked Questions
Last Updated: September 20, 2026
Where Roaches Enter Apartments: Common Entry Points
Roaches slip through gaps you can barely see. Understanding how to seal roach entry points is your first defense against infestation.
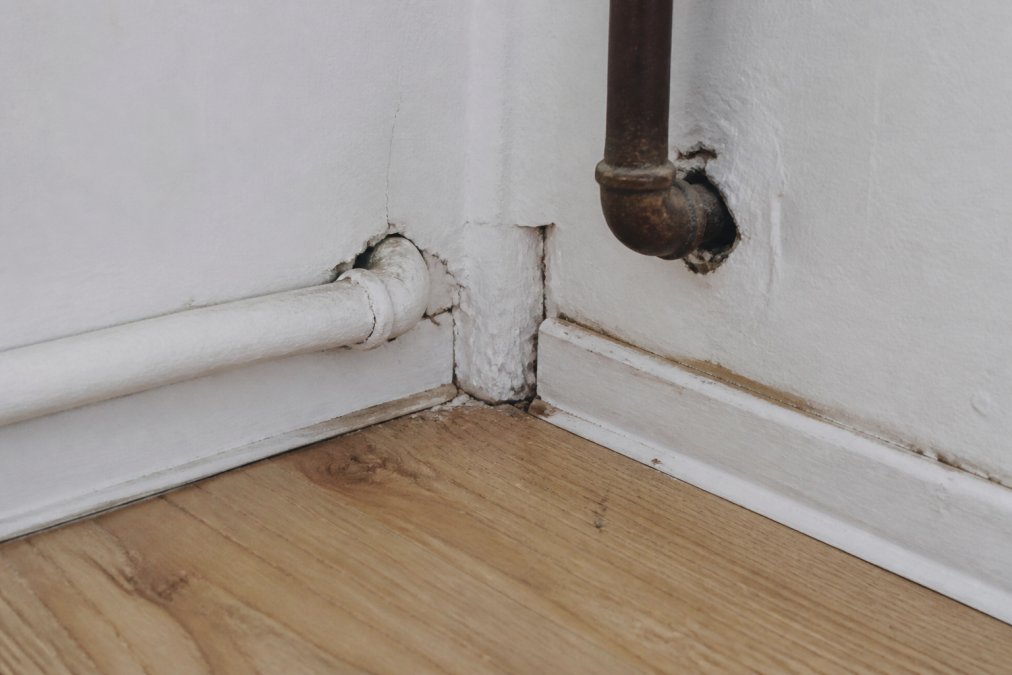
Roaches need only 3 millimeters of space to squeeze through, about the thickness of two credit cards stacked together.
Common entry points include:
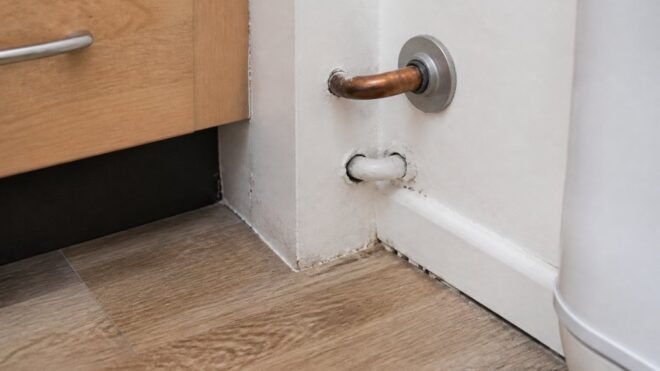
- Gaps around plumbing pipes under sinks and behind toilets
- Cracks in baseboards and corners where walls meet floors
- Door frames and window sills with worn weatherstripping
- Utility penetrations where electrical lines and cable enter
- Spaces around air vents and ventilation covers
- Gaps between cabinets and walls in kitchens
In multi-family housing, roaches migrate from neighboring units through shared walls. Sealing your entry points stops them before they arrive. Walk your apartment slowly, looking for light through cracks and feeling along baseboards. Mark problem areas with tape.
Best Caulk for Roach Prevention and Sealant Selection
Silicone caulk is your best option for sealing roach entry points. Use 100% silicone caulk, not blends, it stays flexible, resists moisture, and lasts for years. It holds up better in damp areas and resists mold and mildew.
Paintable silicone caulk works if you want to match your walls. Use a caulking gun and smooth the bead with a wet finger for a complete seal.
How to Seal Gaps Around Pipes Under Sink and Other Plumbing
Pipes are roach highways. Start under your kitchen sink where water lines enter the cabinet and where the drain pipe exits, these are prime entry points.
Step-by-step sealing process:
- Turn off water and dry the area completely. Moisture prevents caulk from bonding.
- Clean out debris around the pipe with a damp cloth. Let it dry fully.
- Apply silicone caulk around the pipe where it enters the wall or cabinet. Use steady pressure on the caulking gun.
- Smooth the bead with a wet finger. This creates a complete seal with no air pockets.
- Let it cure for 24 hours before running water.
For large gaps, use expanding foam first to fill the bulk, then trim and seal with silicone caulk. Apply the same treatment to bathroom pipes and utility lines (internet, electrical, gas) where they enter the apartment.
Sealing Door Sweeps, Windows, and Baseboards
A door sweep blocks the gap between the door and floor. Most cost under $20 and install in minutes with screws or adhesive.
For windows, use weatherstripping tape along the frame. Caulk gaps between baseboards and floors, roaches follow room edges and use these crevices as highways. For sliding glass doors, use a door sweep and caulk frame edges.
Using Expanding Foam for Larger Crevices and Utility Lines
Use expanding foam for large gaps (1/4 inch to 1 inch) around pipes, utility lines, and air conditioning units. For gaps under 1/4 inch, silicone caulk alone is sufficient.
Look for expanding foam labeled fire-rated or fire-blocking that meets ASTM E84 standards. In multi-family buildings, utility penetrations are fire barriers, and building codes require fire-rated sealants. Common brands include Dow GREAT STUFF Fire Block and Henkel Loctite Tite Foam Fire Block.
Use low-expansion foam for apartment work, it expands slowly and predictably, giving better control in tight spaces and reducing overflow risk.
Application Steps: (1) Prepare the area and dry completely. (2) Shake the can for 15-20 seconds. (3) Apply foam in short 2-3 second bursts, filling the gap halfway to allow for expansion. (4) Let cure 8-24 hours. (5) Trim excess with a utility knife. (6) Seal the foam with silicone caulk to create a waterproof barrier and let cure 24 hours.
Combine sealing with roach baits for maximum effectiveness. Deploy baits under sinks, behind appliances, along baseboards, and behind toilets. Baits kill existing roaches; sealing prevents new ones from entering.
Utility lines are the primary migration pathways for roaches between apartments. Identify all penetrations (water, electrical, cable, gas, HVAC) and seal them with fire-rated expanding foam to prevent migration from neighboring units.
For shared penetrations, seal your side thoroughly and notify your landlord of gaps in shared walls. Request building-wide sealing, which is more effective than individual unit sealing. Document requests and escalate to local housing authority if roaches persist.
Use expanding foam only in hidden areas. For visible areas, get landlord permission in writing. Silicone caulk is a better choice for renters because it’s reversible and won’t jeopardize your deposit.
Lease-Compliant Sealing: What Renters Can Do Safely
Renters face a unique challenge: sealing roach entry points is essential, but any permanent modification risks your security deposit or lease violation. The good news is that most effective sealing methods are reversible and landlord-friendly if you approach them strategically.
Review your lease for pest control responsibility. In most jurisdictions, landlords are legally required to maintain pest-free premises. Check your state’s tenant rights handbook for specific obligations. Knowing your rights protects you if your landlord refuses to address roaches.
Silicone caulk peels away cleanly and is landlord-friendly. Adhesive-backed weatherstripping and foam tape are completely removable. Door sweeps with adhesive backing are removable; screw-mounted ones leave small holes that are standard in apartments. Expanding foam is permanent, only use it in hidden areas or with landlord permission.
Communicating with Your Landlord
Proactive communication protects you. Send a written message (email is best, it creates a record) to your landlord describing the roach entry points you’ve identified and your plan to seal them using reversible methods. Example:
“I’ve identified gaps around pipes under the kitchen sink and weatherstripping gaps around the front door that may allow pest entry. I plan to seal these using removable silicone caulk and adhesive weatherstripping. These methods are fully reversible and won’t damage the apartment. I wanted to notify you in advance. Please let me know if you have any concerns.”
This accomplishes three things: (1) it documents that you reported the issue, (2) it shows good faith and initiative, and (3) it gives your landlord a chance to approve or suggest alternatives. Most landlords will approve reversible sealing because it reduces their pest control liability.
If your landlord refuses permission, you have a record of the request. If roaches later appear, you can demonstrate that you attempted to prevent them.
Documentation: Your Protection Against Disputes
Take photos before and after sealing. Document:
- The date you sealed each area
- Which materials you used (brand and type)
- The location of each seal (kitchen sink, bathroom window, etc.)
- Photos showing the seal is clean and non-damaging
Store these photos and receipts in a folder on your phone or cloud storage. If your landlord later disputes whether you damaged the apartment, you have visual proof that your sealing was professional and reversible.
Keep the original packaging of materials you used. This proves you used standard, apartment-safe products, not industrial-grade sealants.
When to Involve Your Landlord Formally
Contact your landlord immediately if:
- You spot roaches despite sealing entry points
- Roaches appear in neighboring units
- You suspect roaches are migrating from shared walls
- You need to seal areas that require landlord approval (exterior walls, load-bearing areas)
Send a written notice describing the infestation and requesting professional pest control. In most states, landlords must respond within 24-48 hours. Document everything in writing, texts, emails, or certified mail. This creates a legal record if the landlord fails to act and the infestation worsens.
Lease Language to Protect Yourself
If you’re signing a new lease, negotiate pest control language. Request that the lease state:
- Landlord is responsible for pest control at no cost to tenant
- Landlord will treat infestations within 48 hours of notice
- Tenant is not liable for pest damage caused by landlord negligence
- Tenant may break the lease without penalty if landlord fails to address pest issues
These clauses protect you if an infestation occurs and your landlord is slow to respond.
Move-Out Restoration
When you move out, remove all reversible seals:
- Peel off silicone caulk completely
- Remove weatherstripping and foam tape
- Fill screw holes from door sweeps with paintable caulk
- Touch up paint if needed
Leave the apartment in the same condition as when you moved in (minus normal wear).
When to Call Professional Pest Control for Roaches
DIY sealing prevents new roaches from entering. It doesn’t eliminate roaches already inside your apartment.
Signs you need professional help:
- You’ve spotted roaches in your apartment
- Roaches appear in neighboring units (migration risk)
- Sealing entry points doesn’t stop sightings
- You have a severe infestation
- Your landlord requires professional treatment
Conclusion
Sealing roach entry points in apartments is your first defense against infestation. Start by identifying gaps around pipes, baseboards, doors, and windows. Use silicone caulk for small gaps and expanding foam for larger ones. Weatherstripping and door sweeps handle doors and windows. These methods are renter-friendly and reversible.
Real Customer Questions About Roach Sealing and Treatment
Frequently Asked Questions
What are the most common roach entry points in apartments?
Roaches typically enter through gaps around plumbing penetrations (3 millimeters or larger), cracks in baseboards, gaps under doors, spaces around utility lines, and openings where pipes pass through walls. Older apartment buildings are especially vulnerable because settling and age create larger crevices. Check under sinks, behind appliances, and around electrical outlets, these are prime entry routes for cockroach infestation.
Is silicone caulk effective for keeping roaches out?
Yes, silicone caulk is one of the best caulk for roach prevention because it remains flexible, resists moisture, and creates a lasting barrier. Roaches cannot chew through properly applied caulk. For best results, use paintable or clear silicone caulk rated for pest exclusion, and ensure it fills gaps completely. Acrylic caulk is cheaper but deteriorates faster and is less effective as a pest deterrent.
When should I call professional pest control for roaches instead of sealing entry points myself?
Call a professional pest control service if you already see roaches in your apartment, if sealing gaps hasn’t stopped activity after two weeks, or if you suspect migration from neighboring units. Professionals can identify hidden entry points you may miss and treat existing infestations, sealing alone won’t eliminate roaches already inside. A licensed pest management professional can also advise on building-wide solutions if multiple units are affected.
Can I seal roach entry points in my apartment if I’m renting?
Yes, most lease-compliant sealing methods are permitted for renters. Caulking visible cracks, applying weatherstripping to doors, and installing door sweeps are typically allowed without landlord approval. Avoid permanent structural changes. Always check your lease first, and inform your landlord if you’re treating a pest problem, many jurisdictions require landlords to address pest exclusion in multi-family housing. If sealing doesn’t work, request that building management contact a pest management professional.
